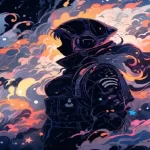
Have you ever thought about how you can make your journey to the Midjourney AI platform better so that you can get the most out of it? Well, Midjourney is one of the most advanced and popular AI image generators that gives you the opportunity to give commands and turn your imagination into a virtual image. In addition, it is powered by an OpenAI company that is known for its interactive artificial technological advancements that are making it better for its users.
When we come to discuss the deep side of the Midjourney AI image generator, it is based on generative adversarial network (GAN) architecture that is used to generate new data instances that resemble previous data. It is the most advanced AI technology that enables the Midjoureny to create artificial intelligence stunning images that look like humans but actually have a resemblance to them. Do you want to know secret Midjourey tips as a beginner to enhance your experience of generating AI images? Well, you are in the right place!
In this guide, you will find out how you can use Midjourney properly, fundamental Midjourney strategies to boost its productivity, and all the related aspects that will help you to start creating stunning AI art pieces. So, let us start to discuss some basics, and then we will go deeper for the real tips to use the Midjourney generative art creator platform.
Introduction to Midjourney For Beginners
When we talk about the starting points for Midjourney, things get simple yet also some nerdy as it is a platform that creates new advancements in creativity. Midjpiurney AI is a remarkable platform that allows you to turn your thoughts into stunning AI images. It is owned by David Holz and become a frontrunner in AI image generation, alongside other prominent names like Stable Diffusion and DALL-E. Notably, you have to join its Discord servicer to get started with the AI image generator. The Midjourney platform allows you to get a free trial so that you can explore it and learn about its capabilities. In this free trial version, you will get 25 fast GPU minutes that are just like tokes; you can generate images by using them on the platform.
Creating AI images on the platform is quite simple and amazing, as you just need to give the commands or prompts in the prompt section, and that’s it. The AI will provide you with a grid of different variants of your imaginative image and also provide you with multiple options, such as image enhancers and more variations. This approach makes you a pro artificial intelligence image generator. Whether you are a pro artist or a beginner, the use of Midjourney AI is quite simple.
Moreover, there are so many other attributes, strategies, and tips that enable you to increase your Midjourney experience. In the next section of our discussion, we will discuss some amazing and secret tips for you that will boost your productivity on the Middjourney platform. Whether you are a beginner to Midjourney or a pro player of it, these tips are for all and make you more expert on this platform. So, let us dive into the real knowledge ocean that will make you master creating AI art pieces while using the Midjourney AI platform.
14 Midjourney Tips For Beginners
The following is the list of strategies and tips that will help you create stunning AI images and make you more efficient in using Midjourney AI. Let us start to explore.
Tip No. 1: Adjust Your Midjourney Default Account Settings
Your Midjourney adventure starts from your account, and that is why our first tip is to make your account default settings ideal for creating AI images perfectly and conveniently. You might feel funny, but trust me, it can make a big difference in how you generate prompts through their images. There are many users who do not even know that they can actually change their Midjourney default settings. That is why we are making it simple for you to learn how you can change them according to your preferences.
To do so, all you need to do is type “/settings” in your Discord chat. Once you do that, a menu will pop up, giving you several options to adjust things according to how you like them. There, Inside the settings menu, you’ll discover many parameters that you can play around with.
In addition, If you are worried about consuming your fast hours too quickly, you can turn on the “relax mode” from there. It will allow you to save your fast hours, and every image you create will automatically follow the relaxed mode settings, helping you manage your fast hours more efficiently.
Tip No. 2: Change The Aspect Ratio (AR)
The next tip to make your Midjourney experience even better is adjusting the “–ar” parameter. The ar represents the aspect ratio of AI-generated images, and it will help you to get your desired image results.
To implement this tip, you need to go to the prompt bar and type “–ar,” and right after that, add your desired aspect ratio. For example, if you want to make your AI image aspect ratio 16:9, then you will need to write “–ar 16:9”, and just so, you will get your image with a more cinematic look. It may be a small change, but when you apply this tip, you will find that your images get more appealing and attractive with a real touch.
So, make sure to adjust your AI image according to your preferences, whether you will use that image for a cover photo or upload it on any other social media to gain attraction.
Tip No. 3: Make A Blend Of Your Images
When it comes to discussing, the third valuable tip that will make your Midjourney tour more special is the use of the Blend command for your images. This command allows you to mix up multiple images and craft something completely unique and imaginative. Following are the steps that are involved in making it applicable. Let us learn them:
- Open your Discord chat, where you communicate with the Midjourney AI.
- Now, go to the command bar and type in “/blend” – this will tell Midjourney that you want to create a blend of images.
- After the above step, you will have to pick two images that you want to mix together. You can even go a step further and add three more images if you like, and you can also specify how big or small you want them to be in the final composition.
- Once you are done with selecting all the images that you want to be blended, just hit the send button to Midjourney.
The Midjourney’s smart algorithms will do the rest of the work and create an amazing image that will based on your chosen images. It’s like having your very own digital art mixer right at your fingertips, ready to craft something truly unique and imaginative for you. So, give a shot with the above tip and make your AI masterpiece!
Tip No. 4: Adjust Your Stylize Limitations
When it comes to discussing the fourth tip that will increase your outputs on the Midjourney platform, stylize is one of the most effective ones. It is a feature of Midjourey that allows you to control how closely the AI of the Midjourney platform adheres to your prompts and the ability to explore creative libraries to blend your AI images. But, when you set the stylize value to zero, Midjourney will only follow your prompt and generate an image that closely matches your instructions.
However, if you increase the stylized value, say to a thousand, the Midjourney will get the freedom to be more artistic. This approach will allow the Midjourney to explore unconventional paths and potentially produce more unique and creative outputs for you. So, make sure to use this tip and get an outstanding AI image from Midjourney. To apply this prompt, just copy and paste the following text in the Midjourney’s prompt section.
/Imagine seals--stylize 50000Tip No. 5: Use Ninji Model (An Animated Styled Image)
Do you enjoy Anime and its vivid illustrations? If so, you’ll love the Niji model! It is a powerful feature of Midjourney that allows you to create animated-style images. With the use of this feature, you can make your Midjourney outcomes more attractive and engaging.
To use this feature, type “-niji” at the end of your Midjournet prompt, or you can also select the Ninji style from the Midjoureny settings. With this approach, all your prompt requests will be transformed into stunning Anime-style pictures. If you are eager to try this amazing tip, use the following command and make it happen:
/imagine a cute dog with a girl walking on the road--niji.This will show you some amazing images that will consist of your prompts in the form of animated pictures with all the essential details.
Tip No. 6: Utilize Multi-Prompt Commands
When it comes to talking about another valuable strategy to empower your Midjourney experience, the use of multi-prompt command (::) comes with a handy approach. It allows you to emphasize the multiple factors in your prompts and also enables you to separate different commands within a single prompt. In addition, the use of the multi-prompt feature of Midjourney also gives you the opportunity to define relationships among different objects, concepts, or actions that will help the artificial intelligence algorithm that gives you stunning images.
For example, if you want to create an image of a hotdog from Midjourney, use hot::dog. It will give the instruction to the journey that you want illustrations of a cup and a cake separately. So, follow this tip, and you can ensure that the generated image meets your expectations and requirements with all the essential details.
Tip No. 7: Must Add Negative Keywords
Getting exact and seamless results on the Midjourney AI platform, defining the things that you do not want to do to the Midjourney AI, called Negative Keywords. These keywords indicate the platform and refine your image outputs by excluding specific items or colors from the generated image.
The use of this feature is quite simple. For example, if you want to eliminate the green color from your image, just write the “–no green” parameter in your prompt, and the AI will ensure not to add any green color to your AI image. This tip for beginners of Midjourney allows them to control their preferences and get your images more effectively.
Tip No. 8: Clearly Tell Your Perspective To Midjourney
Te Midjourney AI is a platform of possibilities. The more you make your prompts specific, the more you will get more productive, concise, and targeted AI images. In addition, you can make your images more stunning by using viewpoint specifications.
For example, if you want to get an aerial view of a man walking on the shore of an ocean, you will need to add the instruction of “drone angle,” or you can also use “aerial view” so that the Midjourney AI can process that command and give you the high-quality image that you are imagining. In addition, you can also use the instruction “eagle view” in your prompt to get your desired AI image with a specific viewpoint to make an exclusive impact. So, use this Midjourney image generation tip to make your journey more productive and exceptional.
Tip No. 9: Adjust The AI Image Lighting Settings
One of the most impactful Midjourney tips for newcomers is to make sure about the lighting impact in your images. You can command the Midjourney AI about the texture of the light in your AI images to make them more realistic and stunning. For instance, if you are going to generate an AI image of a girl in a park sitting on a bench on a warm evening with a sun setting period, instead of writing such a command with so many words, use “golden hour” instruction in your command and the Midjourney AI will create an appropriate lighting texture with a warm feeling. This whole approach will help you to create realistic yet generative AI images. Make sure to use this tip and adjust the lighting impact for your AU images.
Moreover, you can use multiple lighting options that Midourney allows you to use for an amazing effect in your images, such as torchlit, shimmering light, or even dramatic lighting. Using one of these prompts enables you to make your images more interesting and appealing.
Tip No. 10: Get Inspirations From Famous Art Work
This tip could be a game changer that allows you to explore more and more creative art prices on the Midjourney AI platform. There are a few simple steps that allow you to add famous artworks to your Midjourney prompts. Here is the detail of how you can add famous AI art pieces to your Midjourney commands:
- The first step is to get inspired by stunning art pieces, and for that, explore and pick an AI image that inspires you, such as “Monalisa Lisa” by Leonardo da Vinci or “The Persistence of Memory” by Salvador Dalí so that you can use them in your Ai images.
- Now, you need to think about how you can add your perspective or creativity to those art pieces and make your own version.
- Write your prompt after deep observation of the chosen artwork that inspires you to make your own modifications and give it new creative angles.
- Once you are done with constructing your prompt to regenerate famous artwork, just hit the Enter button and let the AI do the rest of the work.
Use the above steps and consider this tip for making your Midjourney AI journey more productive and effective.
Tip No. 11: Do Not Use Punctuations In Your Prompts
Many beginners claim that there is so much information is missed when they write prompts to generate AI images. This is due to the punctuation that you used in your commands while using the Midjhourney AI platform. Remember that tip: avoid using punctuation, as it is not a reliable way to add periods, exclamation marks, or any question marks. The Midjourney AI focuses on the text and does not get any meaning from the use of punctuation. That is why make sure not to use any kind of punctuation in your prompts and ensure to give specific and concise prompts to get the desired results from the Midjourney AI platform.
Tip No. 12: Use Upscale Feature To Enhance Your Image
One of the most effective ways to get high-quality AI images is to use the Midjourney AI feature Upscale. If you want to enhance your image quality on the Midjourney AI platform, you can perform that task with the given feature under your generated image on the platform. You can select the image number and select accordingly from the given options. (U refers to upscale, and if you see U1, U2, U3, or U4, the numbers show the image number of the AI image grid). When you use this feature, the Midjoureny AI will quickly upscale your image and provide you with a more stunning image that you can use for personal or commercial use (if you have a paid subscription).
Tip No. 13: Be Concise & Specific
When it comes to plotting the thirteenth tip for making a beginner’s Midjourney experience more delightful, concise and specific prompts come with a handy approach. There are many people who will show off that they have crafted a 20000-character prompt for their AI image generation, but you will find that they do nothing but distractions for the Midjourney AI. The more you give concise commands to AI, the more you will get desired and stunning results from it. In addition, to make sure about this factor, be sure to eliminate unnecessary prompts before you finally hit Enter. Most of all, you also get a specific number of prompt credits to use on the Midjourney AI platform, so why waste them? That is why we are providing you with such tips so that you can be more efficient and productive in the Midjourney AI adventure.
Tip No. 14: Add Emojis For Quick Response
For those who are fun AI image creators and are starting their journey on the Midjourney AI platform, this tip is especially for them. Using emojis in the Midjourney prompts allows you to create more creative and hilarious images that can make your day for sure. Do you want to know about how you can add this magic to your AI images? Well, here are the steps you need to follow:
- The first step is to choose an emoji set that depicts the objects, ideas, or moods that you want to add to your Midjourney prompt section. These emojis can range from simple objectives, such as a sun or rainbow, and they can also be an expression in your prompt, such as heart eyes or a smiling face. It all depends on your creativity; the more you get creative, the more you can make your images more responsive and funny.
- Once you paste the emojis according to your requirements, just hit the Enter button to let the AI generate a masterpiece according to your prompts.
By following the above tip, you can make funny and attractive images easily on the Midjoutrney AI platform.
Finalizing Thoughts
Whether you are a beginner or a pro artist creating AI images, the above Midjoourney tips enable you to transform your way using this artificial intelligence machine learning platform. We have covered the most effective tips and discussed every technical corner for making your prompts more effective, targeted, and creative. Whether you want to learn about changing your default Midjourney AI settings or desire to add emojis in your prompts and all in between them, we have covered every angle for you so you can learn how you can use this smart AI platform effectively. So, use the above tips to create stunning AI images from the Midjourney platform.