AI Tutorial
Use n8n to Build an AI Analyst for Your Business Data
Learn how to create an AI-powered data analyst using n8n workflows to analyze spreadsheets and databases, automate reporting, and deliver insights directly to your inbox.
Share
n8n’s no-code automation platform allows you to create intelligent workflows that analyze data from spreadsheets, databases, and other sources while automatically delivering insights to your preferred communication channels.
Best Suited for:
- Business owners needing fast insights without technical expertise
- Analysts automating recurring reporting tasks
- Marketing teams are monitoring campaign performance
- Sales managers tracking team and revenue metrics
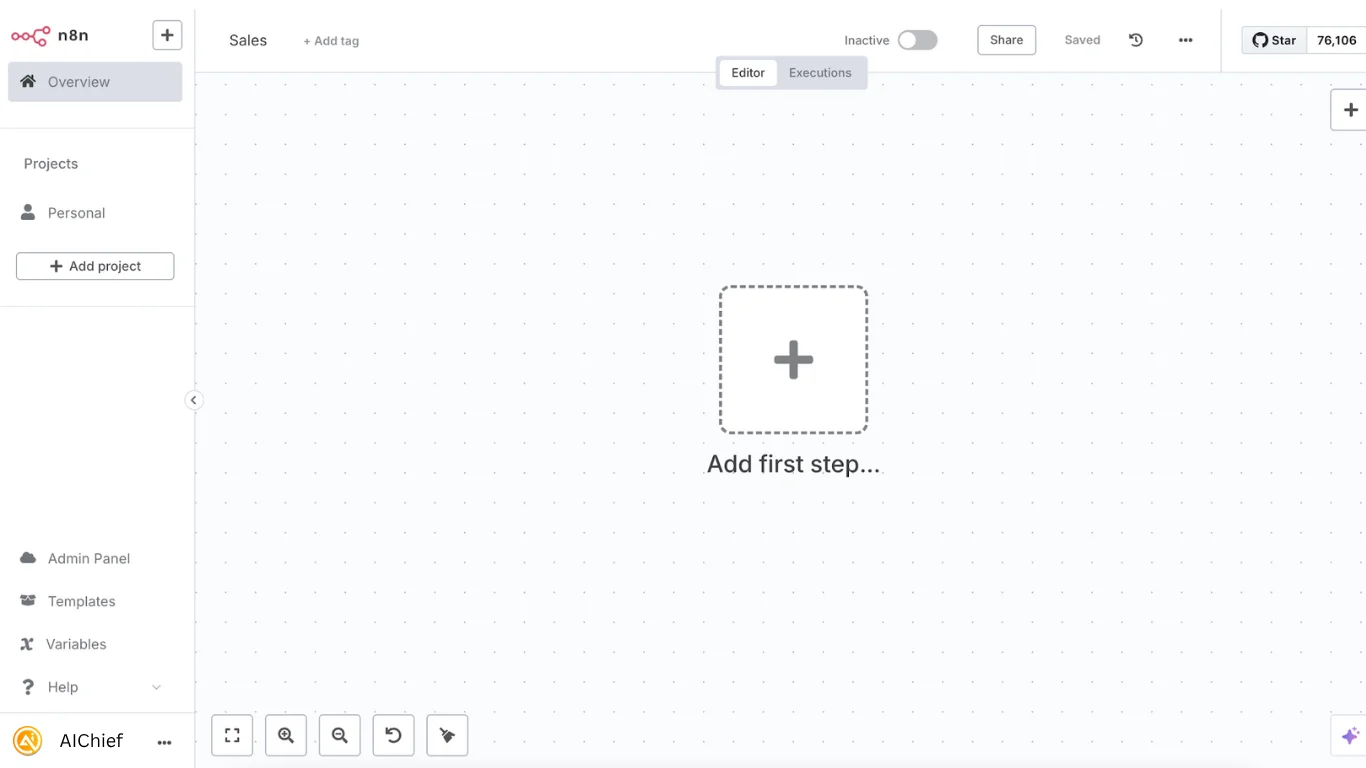
STEP 1: Create Your n8n Workflow
Begin by creating a new workflow inside n8n. From the dashboard, click “New Workflow” to open a blank automation canvas. Give your workflow a recognizable name, such as “AI Data Analyst,” for easier management later.
This workflow will require three primary components:
- A trigger to start the workflow
- An AI agent to process requests and analyze data
- Output nodes to deliver insights and reports
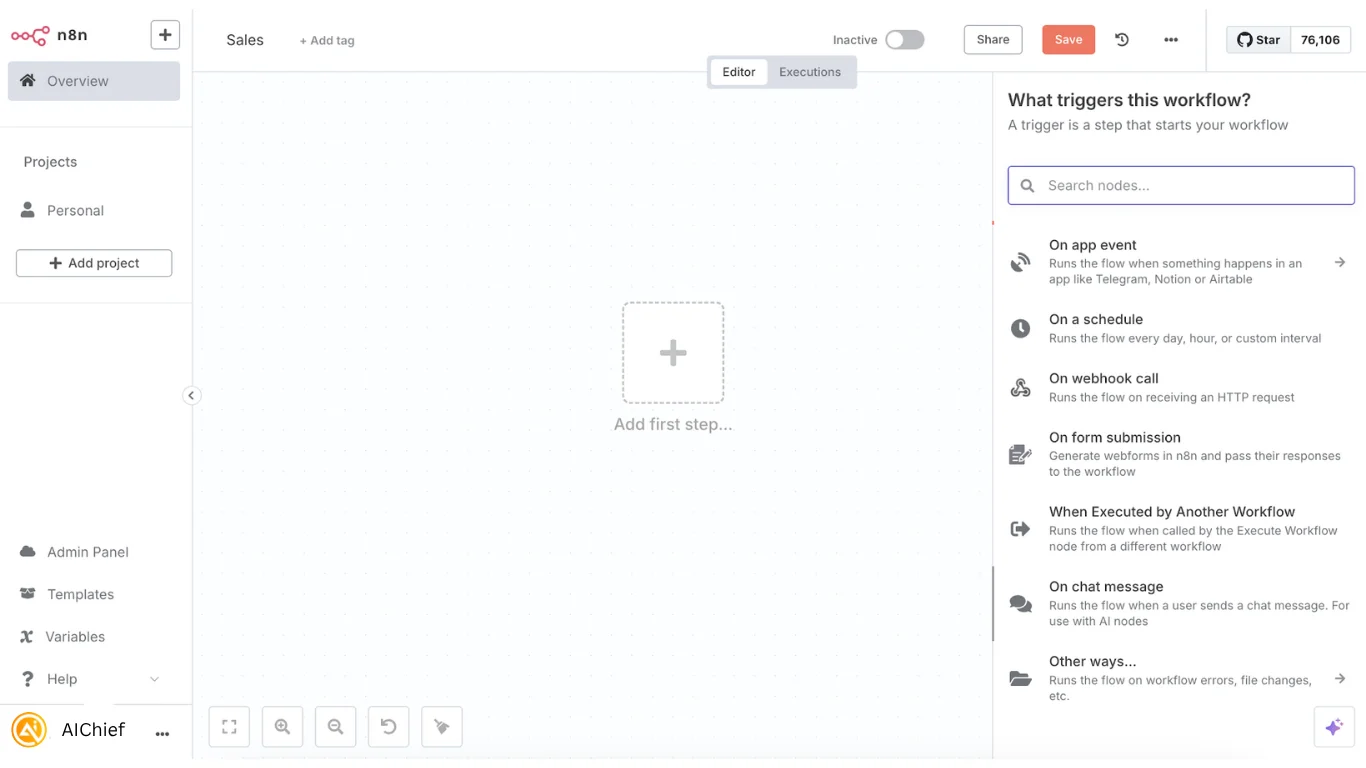
STEP 2: Add a Chat-Based Trigger
The first component is the workflow trigger. Click the “+” button to add a new node and search for “On Chat Message.”
This node enables you to interact directly with your workflow using n8n’s built-in chat interface.
Once configured, any message such as:
“What were our total sales last month?”
will automatically trigger the workflow and pass the request to the AI agent for analysis.
STEP 3: Configure Your AI Agent
Next, add an “AI Agent” node after the trigger node. This acts as the intelligence layer that interprets requests and determines which actions to perform.
Connect the AI Agent to a chat model by selecting “Chat Model” and choosing your preferred provider, such as OpenAI. You’ll need to add your API credentials to complete the connection.
Then configure memory support:
- Click “Memory”
- Select “Simple Memory”
This allows the assistant to retain conversational context and respond more effectively to follow-up questions.
STEP 4: Connect Your Data Sources
Your AI agent now needs access to business data. Inside the AI Agent section, click “Tool” and connect your preferred data source.
Supported options include:
- Google Sheets
- PostgreSQL
- Excel
- MongoDB
- Other databases supported by n8n
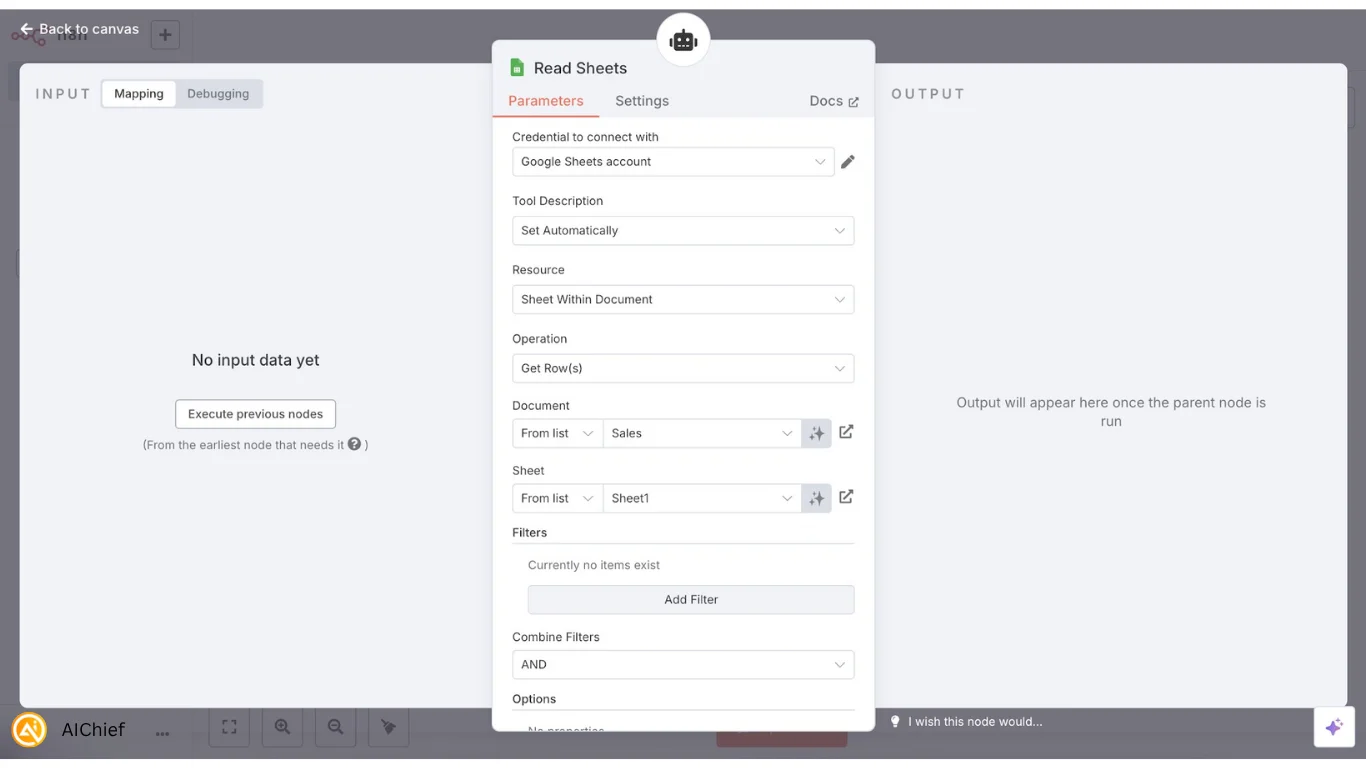
Example: Google Sheets Integration
Configure the Google Sheets node with the following settings:
- Credential: Connect your Google account
- Resource: Select “Sheet Within Document”
- Operation: Choose “Get Row(s)”
- Document: Select the spreadsheet you want to analyze
- Sheet: Choose the sheet containing your data
To help the AI understand the tool’s purpose, rename the node to something descriptive like:
“Read Sales Data”
You can rename nodes by clicking the three-dot menu and selecting “Rename.”
STEP 5: Set Up Output Channels
Now add output nodes to deliver your analysis results. Click the “+” button after the AI Agent and choose your preferred destination, such as:
- Gmail
- Slack
- Microsoft Teams
- Google Docs
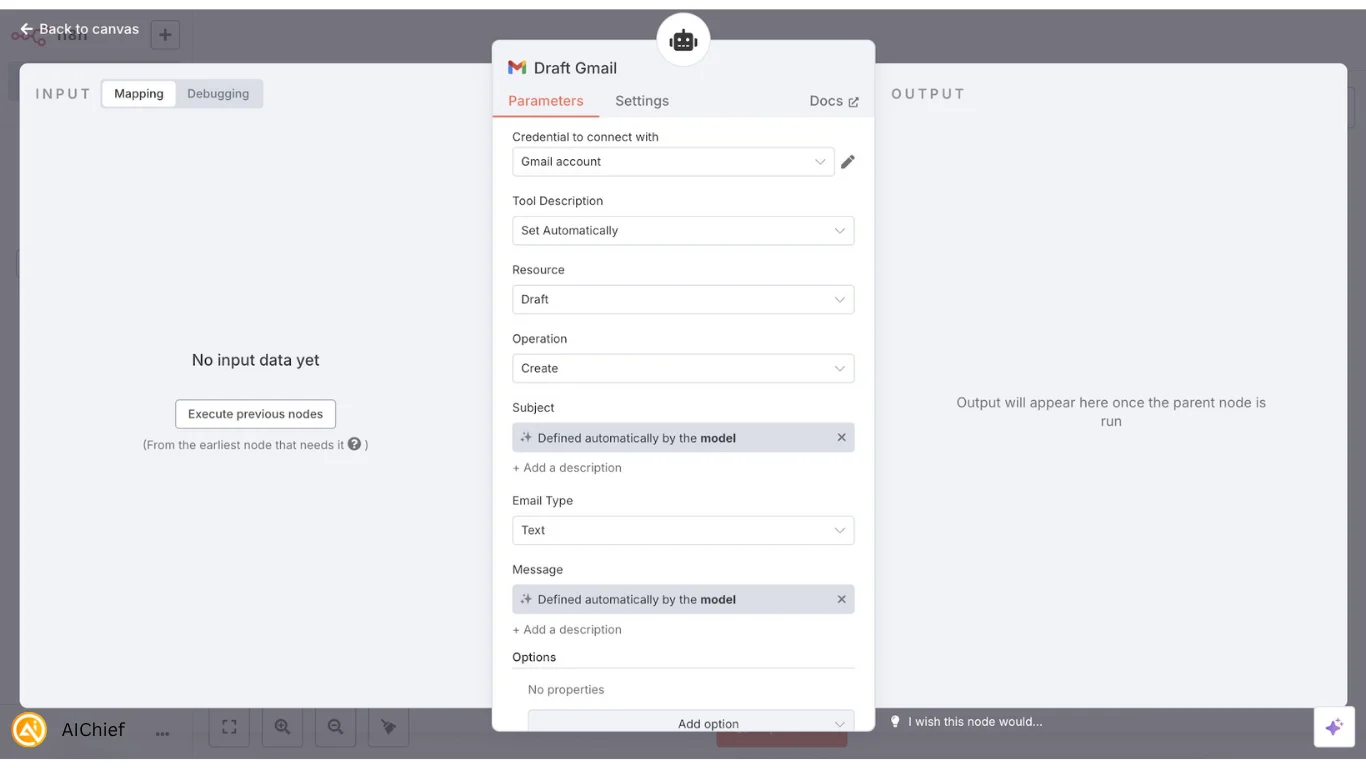
Example: Gmail Reporting Setup
For Gmail draft generation, configure:
- Credential: Connect your Gmail account
- Resource: Select “Draft”
- Operation: Choose “Create”
- Subject: Use the Expression option so the AI can generate subject lines automatically
- Message: Also enable Expression so the AI can format and write the analysis summary dynamically
Rename the node to something clear like:
“Draft Gmail”
This makes the workflow easier to manage as it grows.
Once all nodes are connected, your workflow can transform simple chat requests into automated data analysis and reporting.

Pro Tip
Improve your AI Agent’s performance by adding detailed instructions inside the “System Message” section. For example:
“When users ask about sales performance, revenue, or transaction data, use the ‘Read Sales Data’ tool. When users request summaries or reports, use the ‘Draft Gmail’ tool to generate a formatted report.”
Clear instructions help the AI decide when and how to use each connected tool effectively.
Editorial Staff
The Editorial Staff at AIChief is a team of Professional Content writers with extensive experience in the field of AI and Marketing. AIChief was Founded in 2025, AIChief has quickly grown to become the largest free AI resource hub in the industry. Stay connected with them on Facebook, Instagram and X for the latest updates.


