AI Tutorial
Transform Photos into Personal Branding Videos with Veo 3.1 in Flow
Learn how to turn simple photos into professional personal branding videos using Veo 3.1 in Google Flow with AI-generated visuals and seamless editing.
Share
This guide shows how to create polished personal branding videos using Veo 3.1 in Flow by generating images with Gemini and converting them into dynamic video content.
Who This Is For
- Freelancers building a personal brand without video gear
- Solopreneurs who prefer not to appear on camera
- Side hustlers needing quick, authentic-looking content
- Anyone looking to avoid time-consuming filming and editing
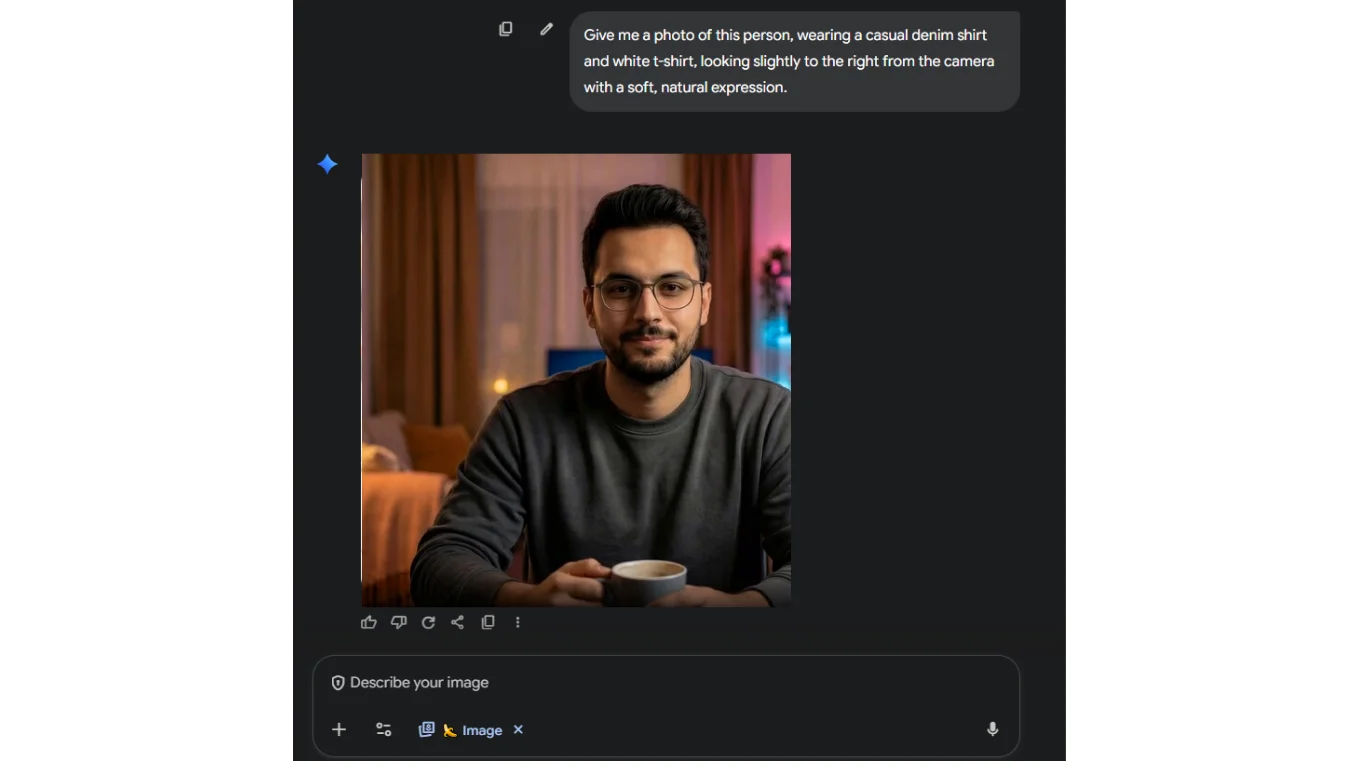
Step 1: Create Your Headshot and Workspace with Gemini
Go to Google Gemini and generate the images needed for your video.
Start with your headshot using a reference photo. Example prompt:
“Generate an image of this person wearing a casual denim shirt and white t-shirt, looking slightly to the right with a soft, natural expression.”
Next, create your workspace background. Example prompt:
“A modern office with a large window overlooking a city, blurred background, natural lighting, minimalist decor, a wooden desk with a white mug, and a small plant.”
Download both images; they will serve as the base for your video.
Step 2: Set Up Your Project in Flow
Open Google Flow and sign in. Create a new project by clicking “+ New Project.”
Change the generation mode from Text to Video to Ingredients to Video so you can use your images.
Upload your headshot and workspace visuals. By default, Flow uses the Veo 3.1 Fast model, but you can switch to Veo 3.1 Quality for improved results at a slower speed.
Step 3: Generate and Adjust Your First Clip
In the prompt field, describe your scene. Example:
“Using the uploaded photo of me, create a video where I’m sitting in the same workspace, smiling at the camera while sipping coffee, then leaning forward to type on a laptop. Warm morning lighting, cozy home office feel. Add soft upbeat acoustic music with subtle keyboard sounds.”
Click Generate and review the output.
Use the edit (pencil) tool to refine details, such as adjusting objects or updating prompts like “make the coffee mug more visible.”
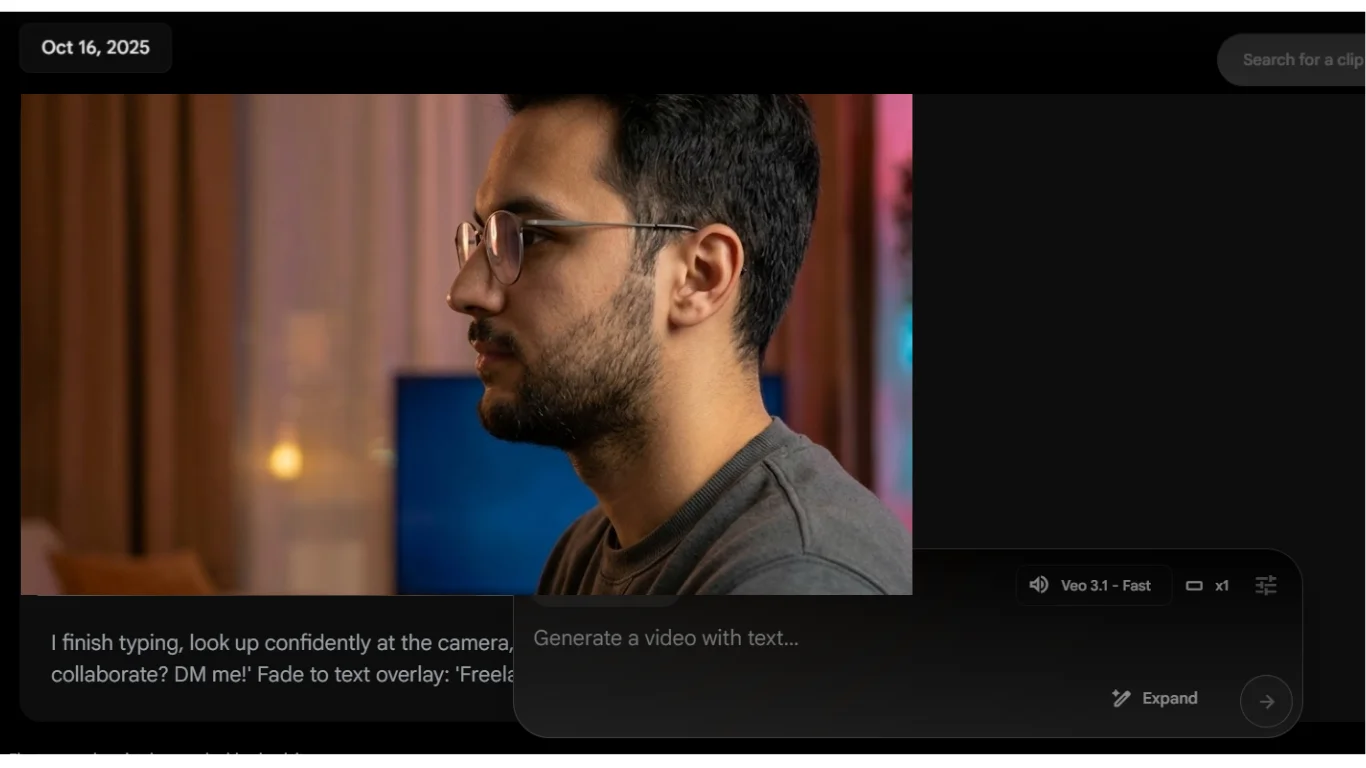
Step 4: Extend and Export Your Video
Once your first clip looks good, click Add to Scene to move it into the Scene Builder.
Click the + icon next to your clip and choose Extend. Then prompt your next segment, for example:
“I finish typing, look confidently at the camera, and say, ‘Ready to collaborate? DM me!’ Fade into text overlay: ‘Freelance Designer | Let’s Chat.’ Keep facial consistency and continue the same music, building to a finish.”
After both clips are aligned, click the download icon to export your final video.
Pro Tip
Use the editing tool to highlight specific areas and insert new elements into your video. This makes it easy to create product demos or training content without recording, just generate and place what you need.
Editorial Staff
The Editorial Staff at AIChief is a team of Professional Content writers with extensive experience in the field of AI and Marketing. AIChief was Founded in 2025, AIChief has quickly grown to become the largest free AI resource hub in the industry. Stay connected with them on Facebook, Instagram and X for the latest updates.


