AI Tutorial
Track Market Trends Daily with Grok and Notion
Monitor trends and competitors using Grok with Notion and Make.com. Generate daily research reports from X and web data in one automated workflow.
Share
Keeping up with market shifts takes time. You scroll through X, scan news, and try to connect insights. This leads to scattered notes and missed signals.
You can set up a system where Grok collects recent trends and turns them into structured reports. With Make.com and Notion, you receive daily research summaries without manual effort.
What you need
- X Premium or Premium Plus account
- Notion account with database access
- Make.com account
- xAI API key
Who this workflow fits
- Business owners tracking competitors
- Startup teams monitoring trends
- Anyone building research systems
What this setup does
You create a Notion database to store research topics. When you add a new entry, it triggers an automation. Grok gathers insights from X and other sources from the past 24 hours. The system then writes a full report back into Notion.
Each entry becomes a structured memo with sources, summaries, and action points.
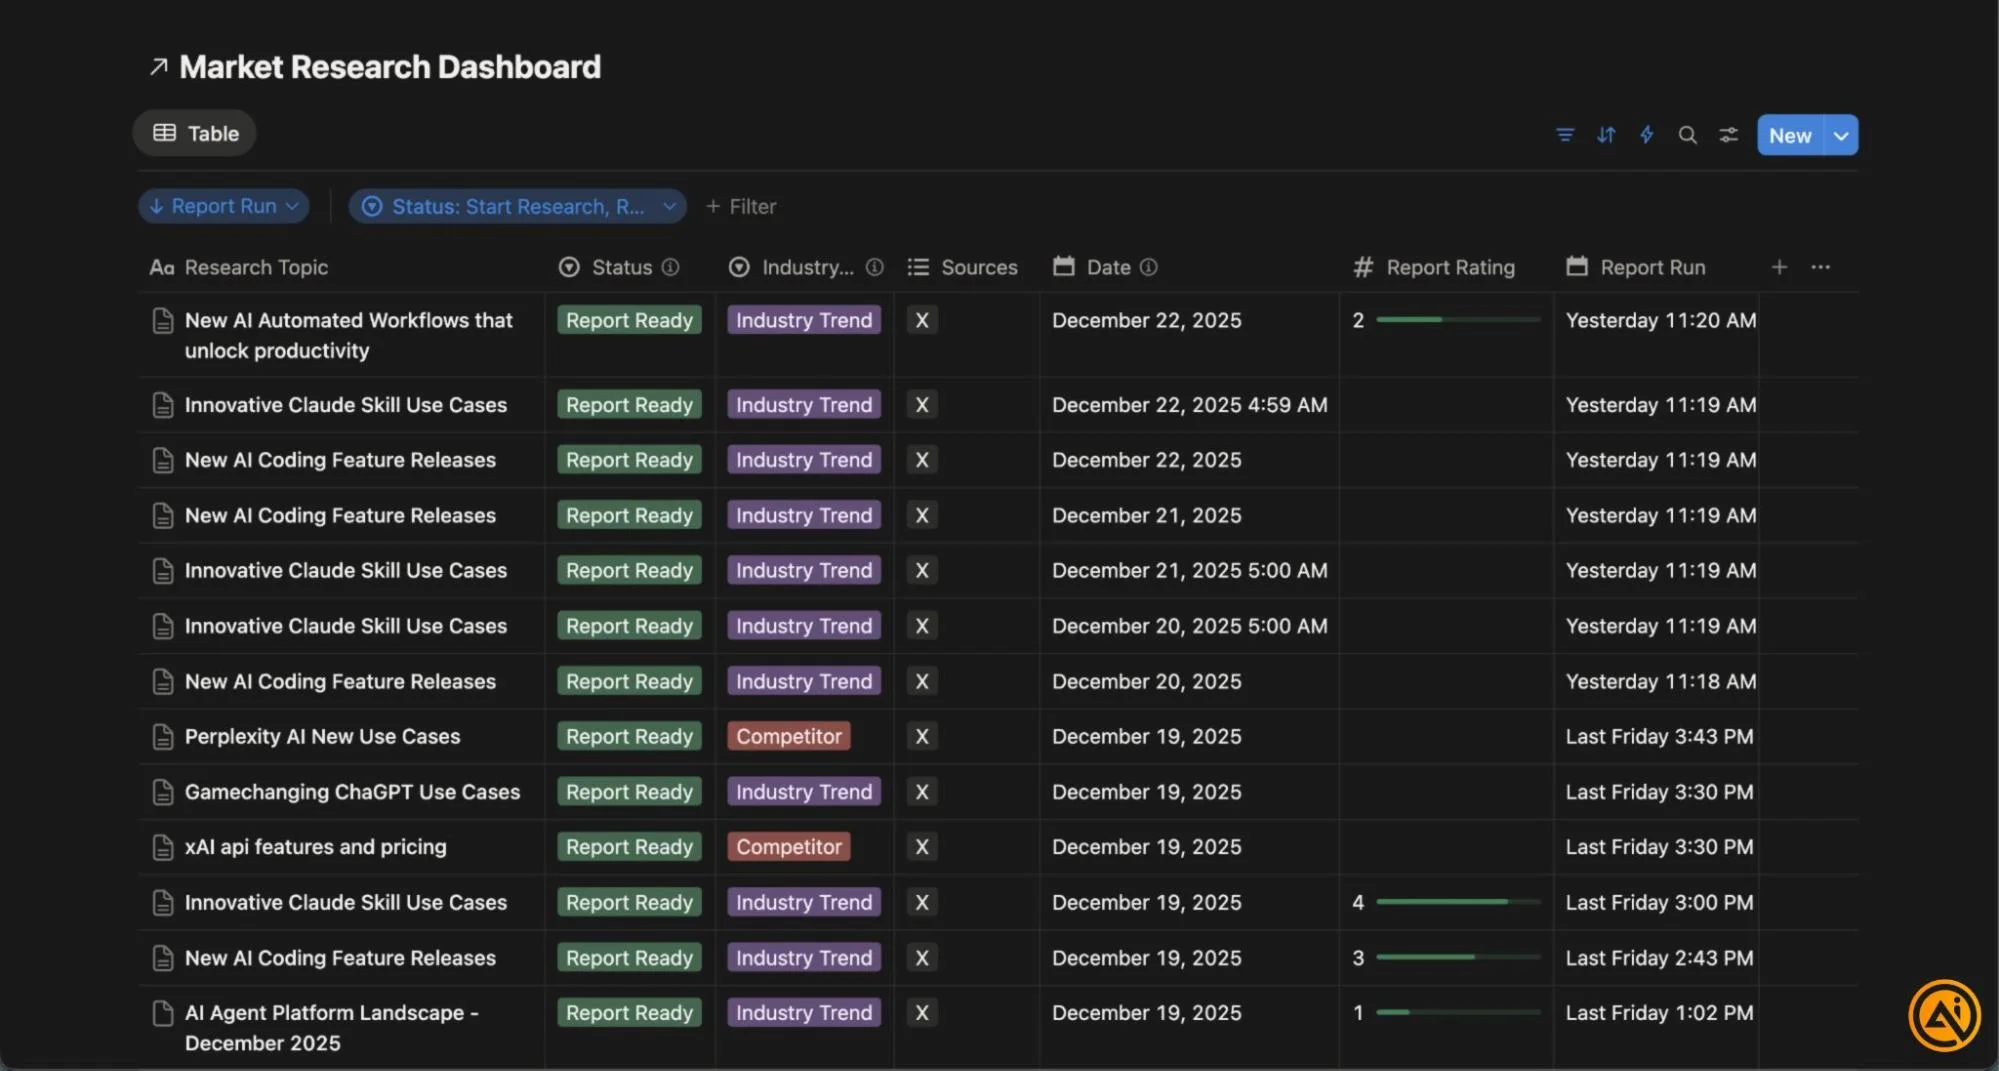
Step 1. Set up your research database
Start by creating or duplicating a Notion database.

Add these fields:
- Research Topic
- Industry or Competitor
- Sources such as X, Web, News
- Status with stages like Start, Ready, Reviewed
- Date
- Research Output
- Action Items
- Citations
This database will act as your control panel.
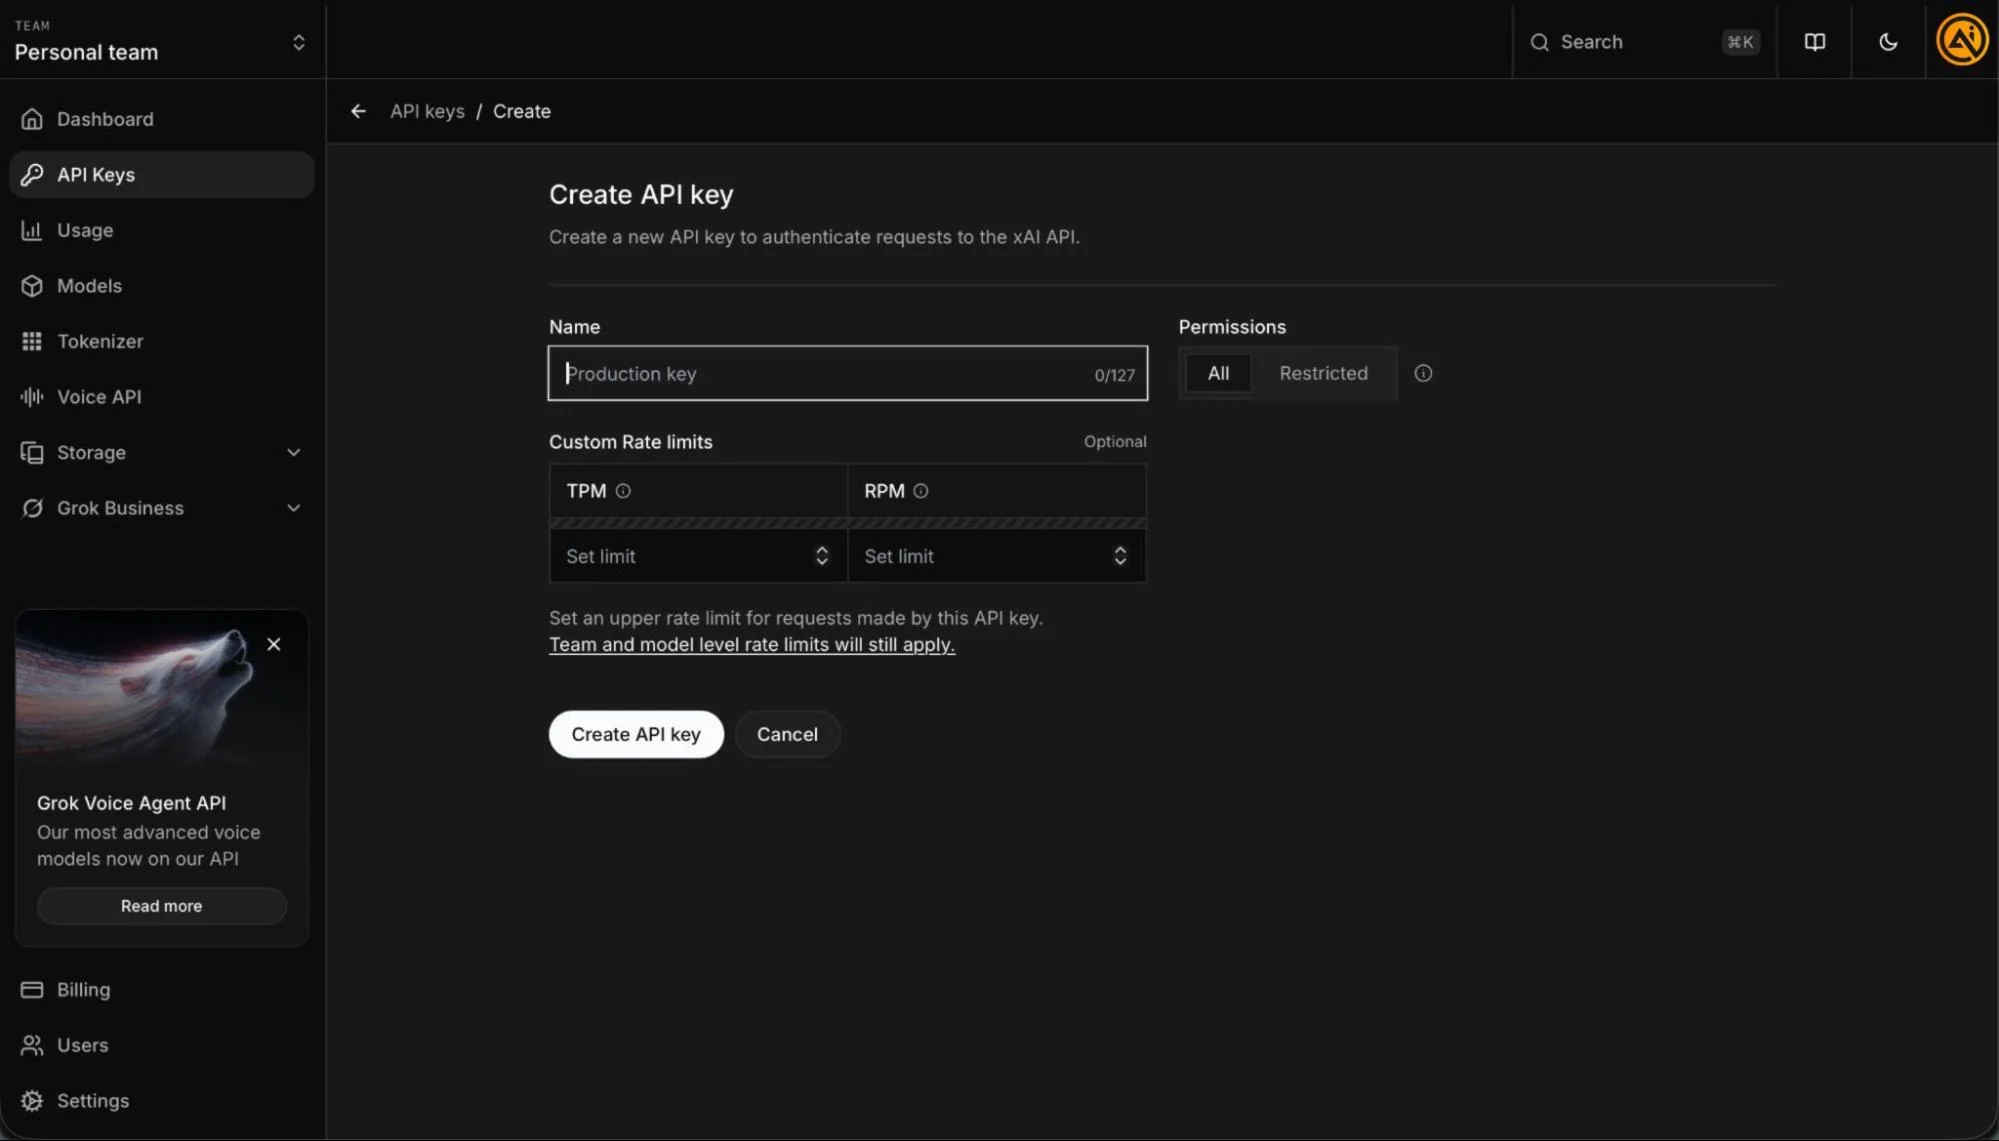
Step 2. Get access to Grok
Go to the xAI console and sign in. Create a new API key and store it safely.
You will use this key to connect Grok inside your automation tool.
Step 3. Import the automation workflow
Download the automation blueprint file.
Open Make.com and create a new scenario. Import the blueprint file. This loads a ready made workflow with connected steps.
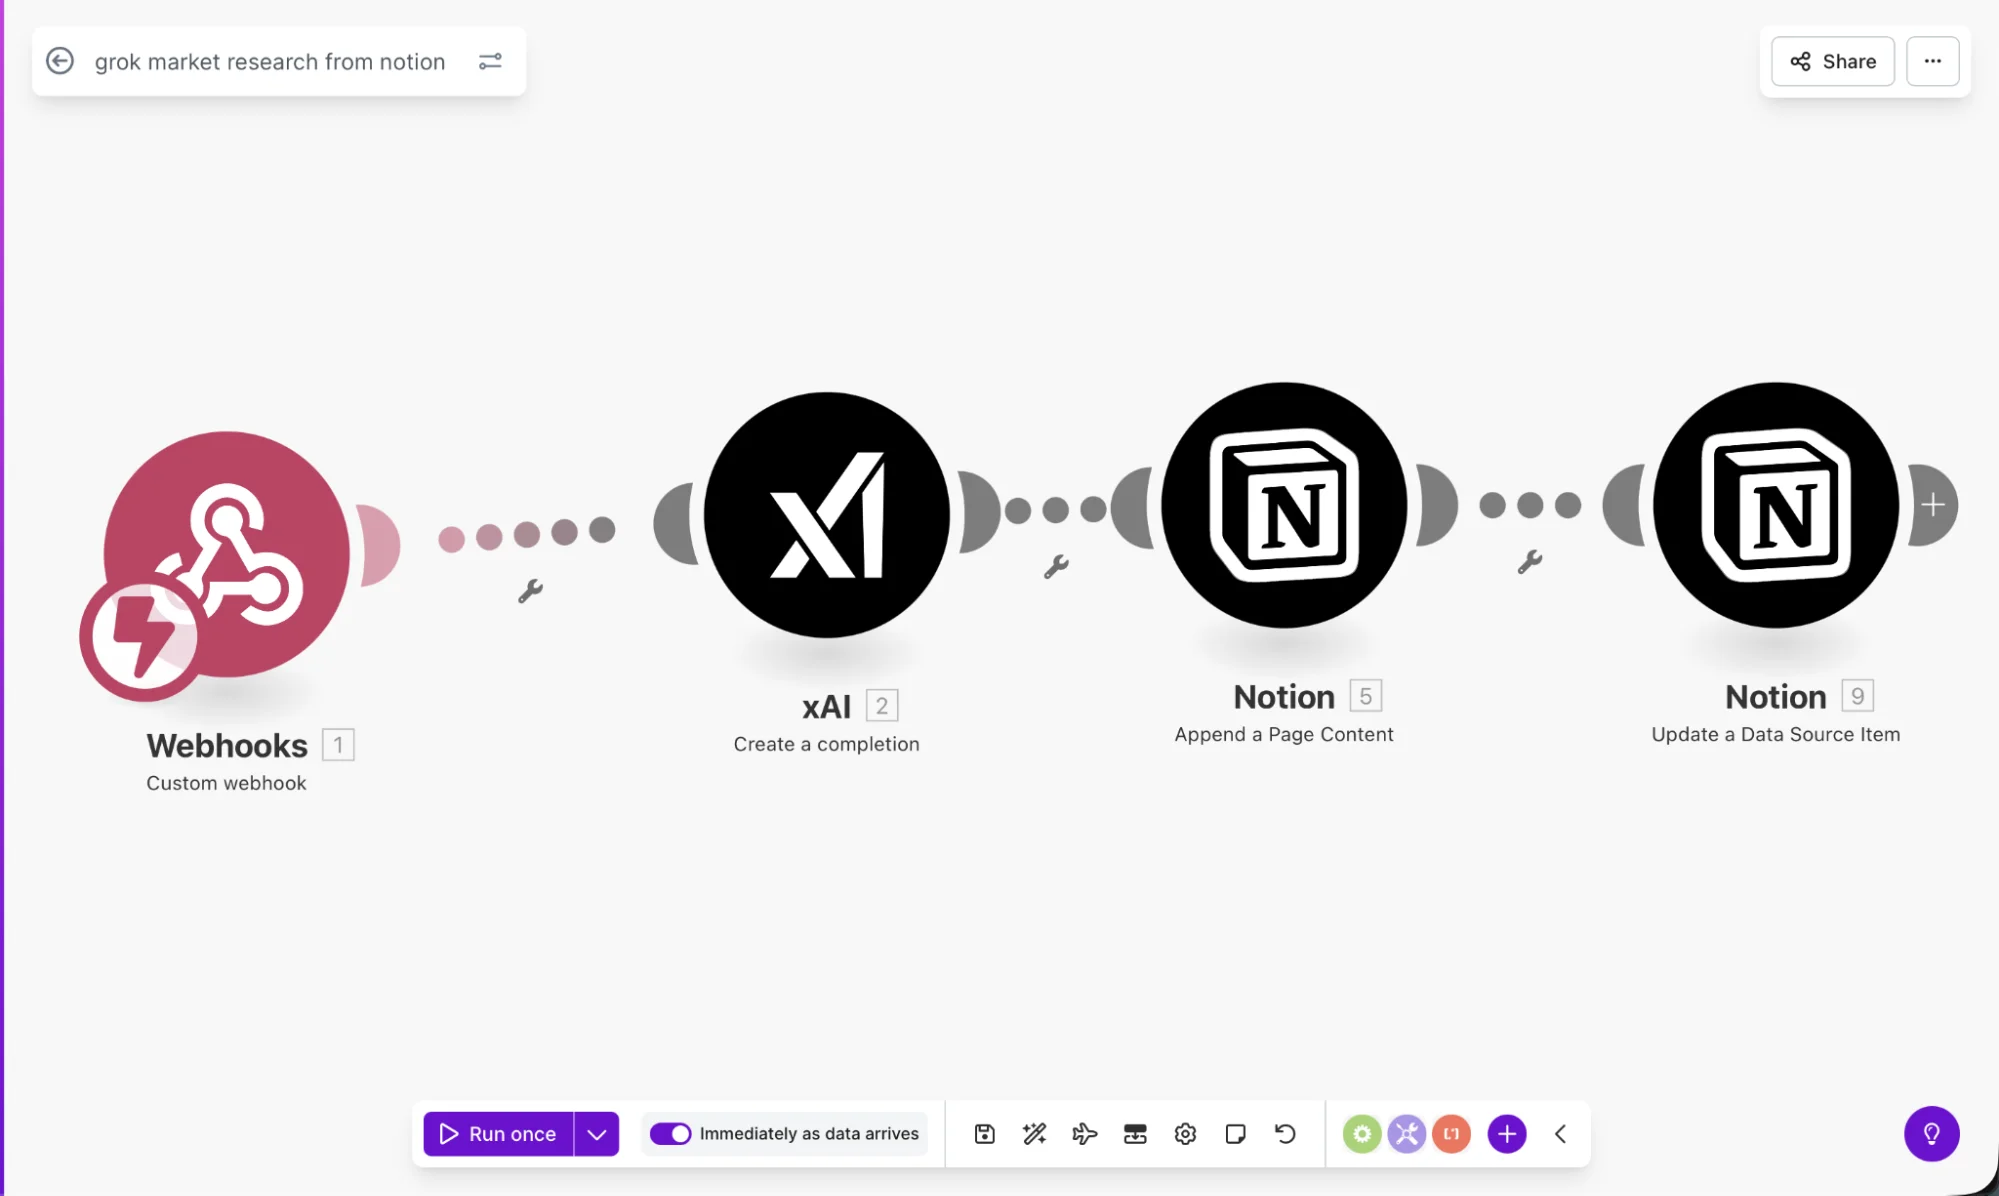
You will see modules for:
- Webhook trigger
- Grok request
- Notion content update
- Notion database update
Step 4. Connect your tools
Open the Grok module and add your API key.
Then connect your Notion account. Grant access to your research database.
Use the same connection across all Notion modules.
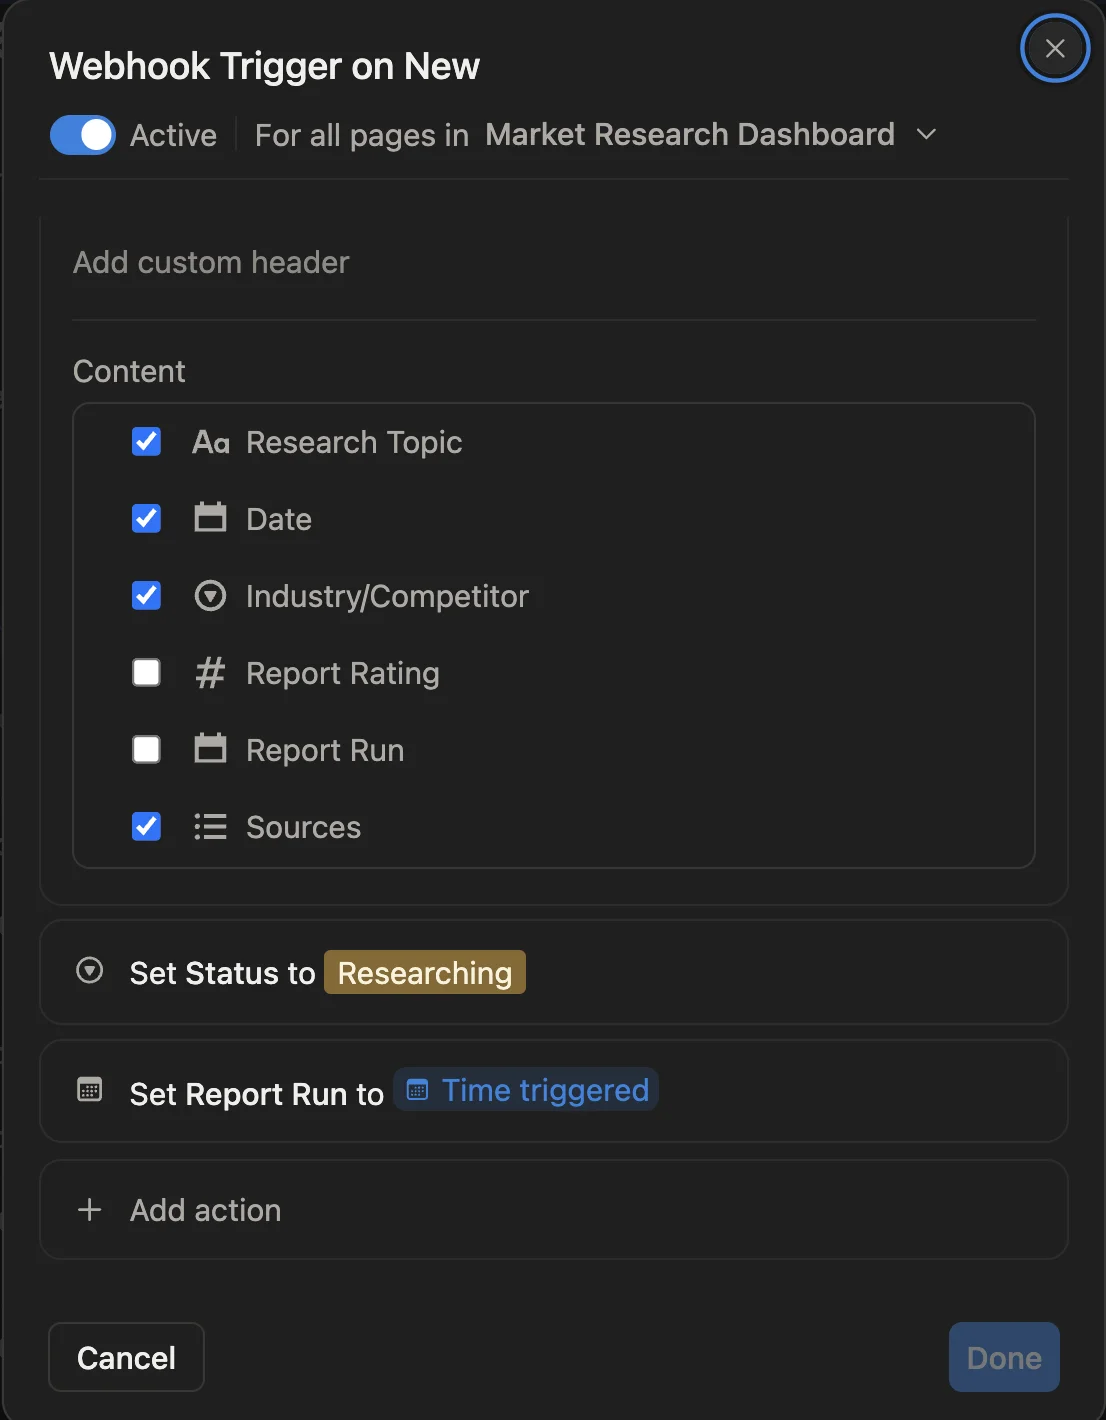
Step 5. Link Notion to the automation
Set up an automation inside Notion.
- Trigger when a new page is added
- Apply a filter where Status equals Start Research
Add an action to send a webhook.
Copy the webhook URL from Make.com and paste it into Notion.
Select the fields you want to send. Include topic, date, competitor, and sources.
This connects your database to the automation flow.
Step 6. Run a test
Create a new entry in your Notion database.
Fill in:
- Research Topic
- Industry or Competitor
- Sources
- Status as Start Research
Save the entry and wait for the automation to run.
After a short delay, open the page again. You will see a generated report with insights and references.
You can format the output using Notion AI or another assistant if needed.
Make this system repeatable
- Create recurring entries for daily tracking
- Use the same topics to monitor changes over time
- Trigger the automation manually to control usage
Result
You move from manual research to a structured system. You get consistent reports with recent data. Your insights stay organized inside one workspace.
Editorial Staff
The Editorial Staff at AIChief is a team of Professional Content writers with extensive experience in the field of AI and Marketing. AIChief was Founded in 2025, AIChief has quickly grown to become the largest free AI resource hub in the industry. Stay connected with them on Facebook, Instagram and X for the latest updates.


