AI Tutorial
Integrate OpenAI Agent Builder with 8,000+ Apps via Zapier MCP
Learn how to link OpenAI Agent Builder with Zapier MCP to access 8,000+ tools and automate workflows, including creating Google Forms.
Share
This tutorial walks you through connecting over 8,000 tools using Zapier MCP and building a form with Google Forms.
Ideal Audience
- AI automation enthusiasts
- Developers linking Agent Builder with external services
- Business teams optimizing workflows
- Educators leveraging AI for productivity
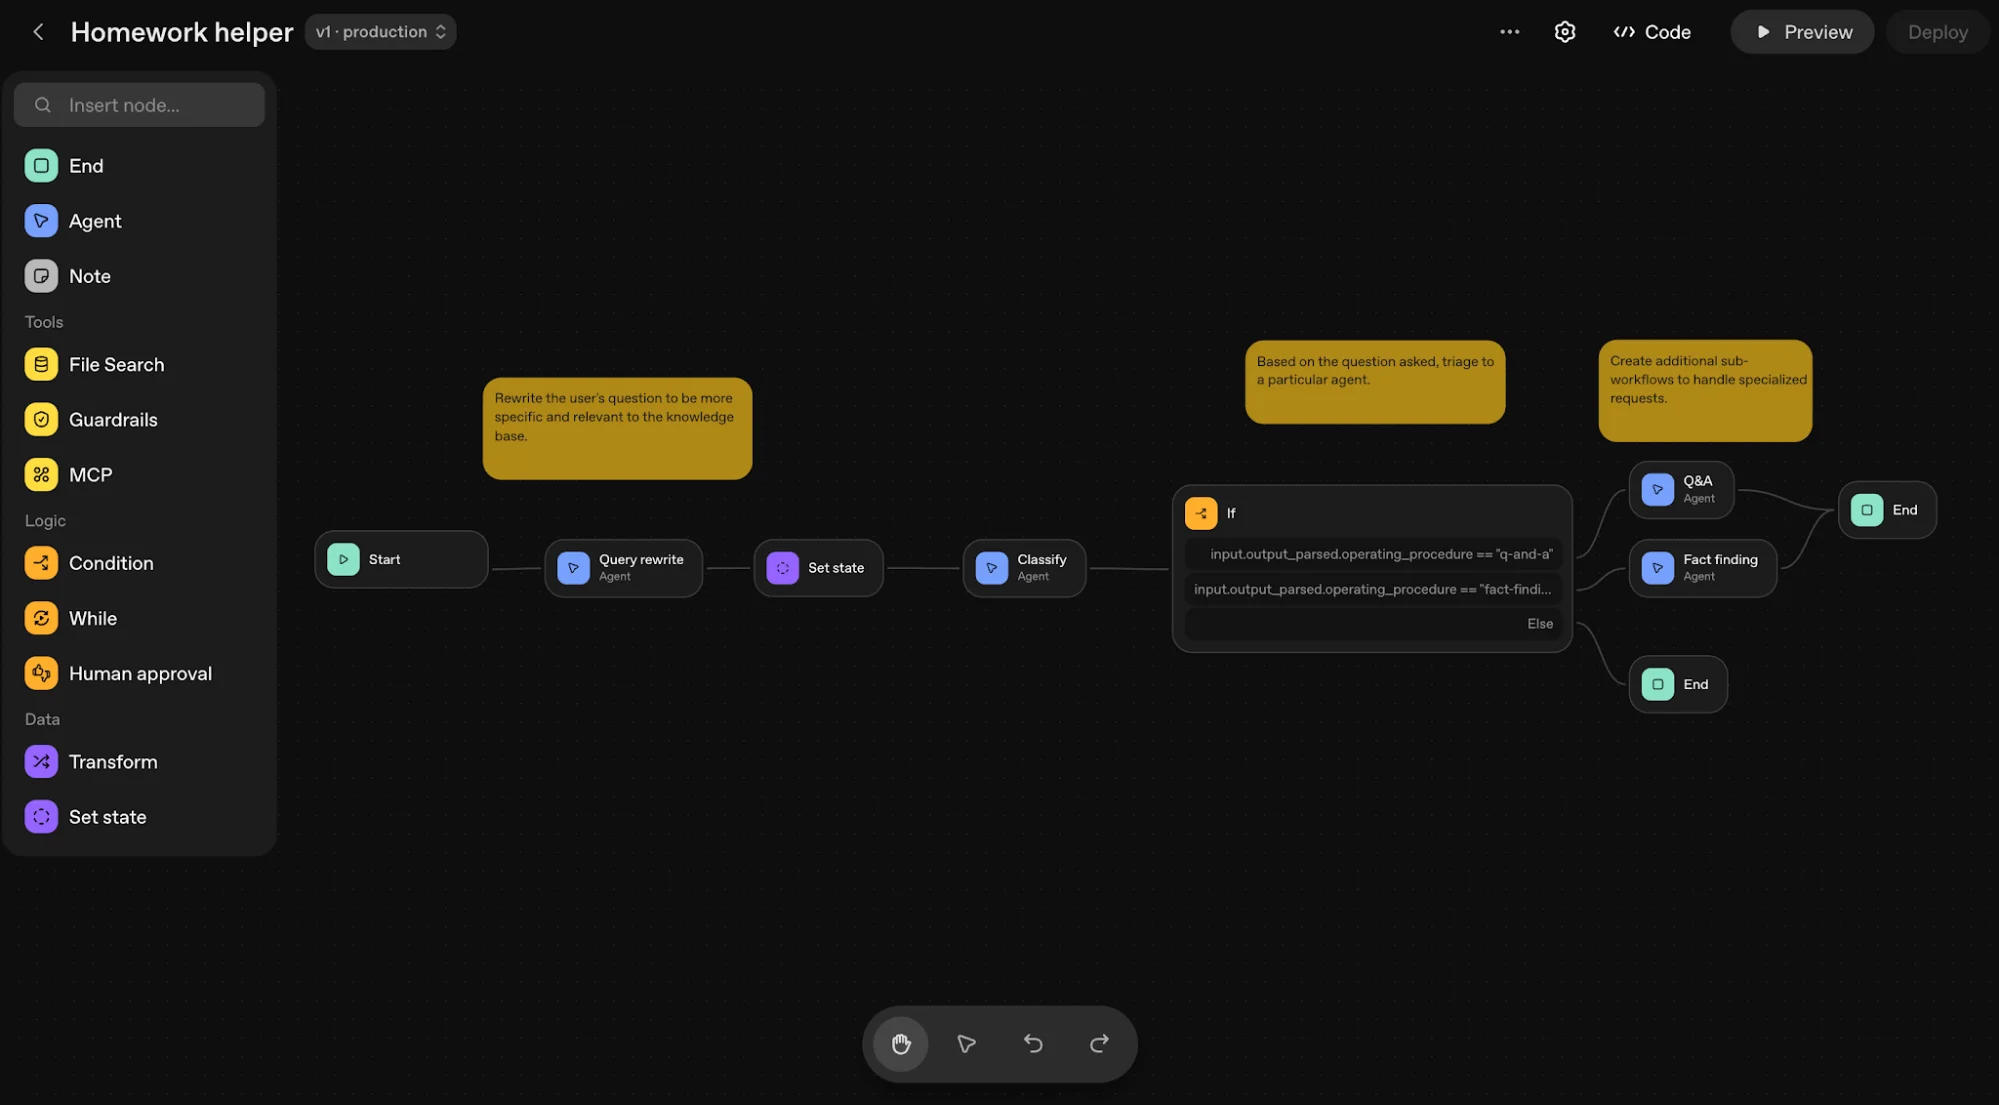
STEP 1: Accessing Agent Builder
To start linking external tools, visit: platform.openai.com/agent-builder
From the homepage:
- Select Agent Builder from the left panel
- This opens the workspace for building workflows
- Click Create to build a new agent
- Alternatively, use a prebuilt template
- The Start node defines the trigger
- The Agent node handles logic and execution
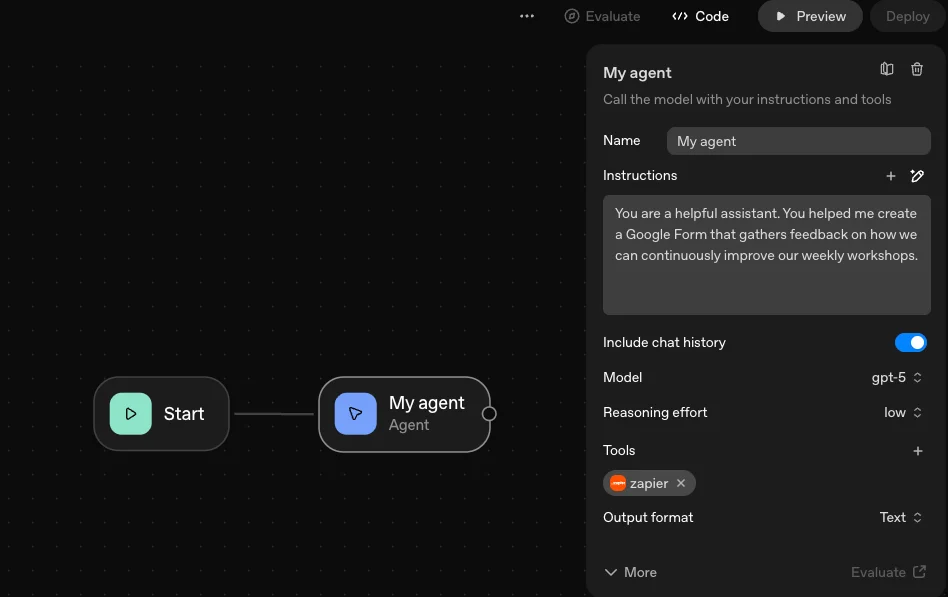
STEP 2: Setting Up the Agent and MCP
Inside the builder:
- Add Agent Instructions, for example:
“You are an assistant who creates a Google Form to collect feedback on weekly workshops.” - Choose your model and reasoning level
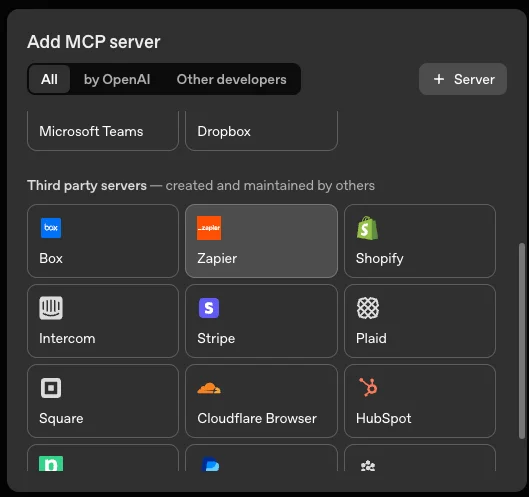
- Click MCP Server, Third-Party Servers
- Select Zapier
STEP 3: Configuring Zapier MCP
Go to: mcp.zapier.com/mcpservers
- Click New MCP Server
- Select OpenAI as the client
- Assign a name (e.g., “OpenAI Server”)
- You’ll gain access to multiple apps
- Add tools like Confluence, JIRA, Notion, or Google Forms
- Choose whether to enable all features of each app as needed
STEP 4: Linking API Keys
To connect everything:
- Open Connect in Zapier MCP
- Copy your OpenAI Secret API Key
- Paste it into the Agent Builder connection field
- Click Connect
- Choose No Approval Required for easier setup
- Your selected tools (e.g., Google Forms) will appear
STEP 5: Running a Test
Before testing:
- Ensure your OpenAI organization is verified
- If Preview or Evaluate is disabled, verify via API Organization settings
Then:
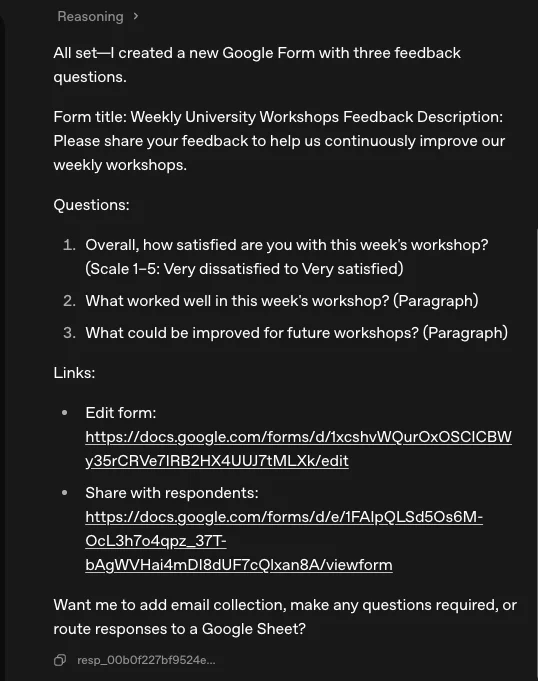
- Click Preview
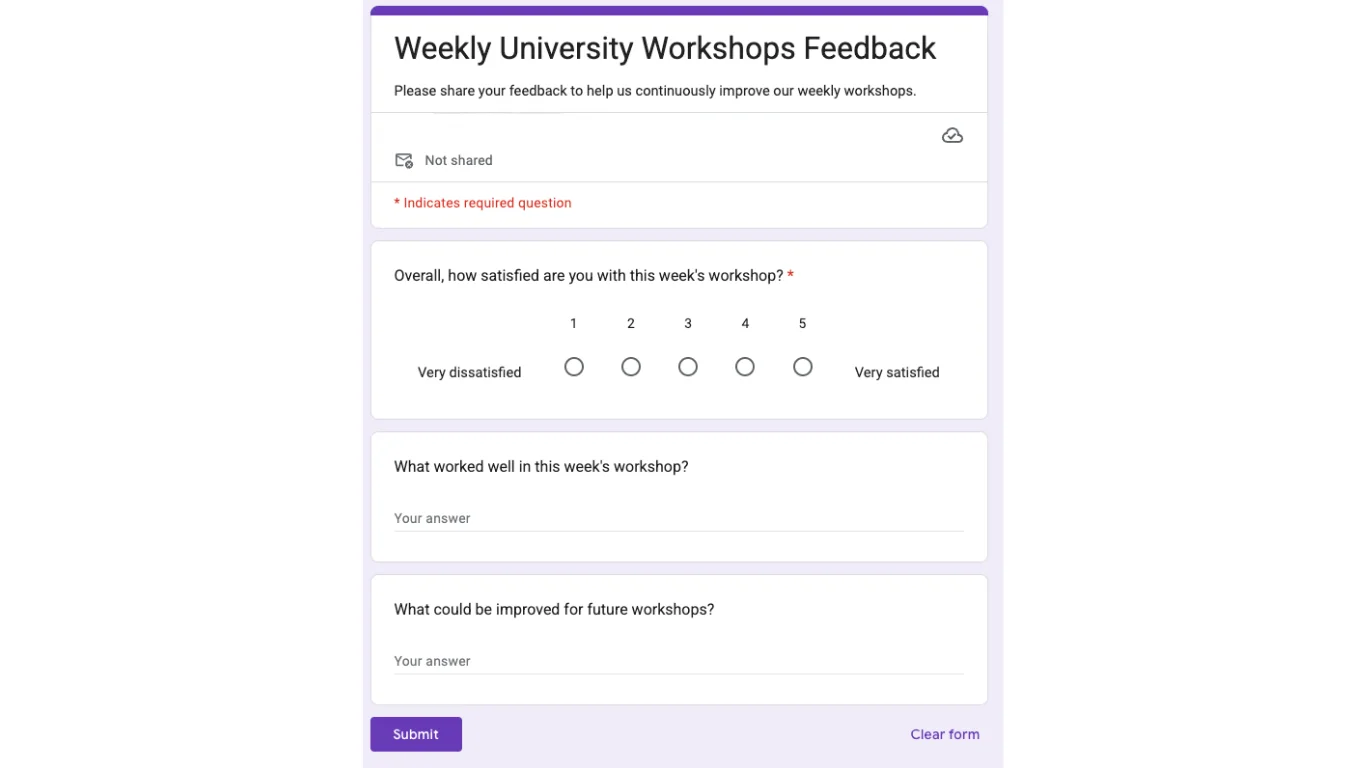
- Try a prompt like:
- “Create a Google Form with three questions for workshop feedback.”
The agent will generate sample questions such as:
- How satisfied are you with this workshop?
- What worked well?
- What can be improved?
STEP 6: Publishing the Workflow
Once everything works:
- Click Publish in Agent Builder
- Assign a name (e.g., “Form Builder”)
- Save your setup
Your agent is now connected to Zapier MCP, unlocking access to 8,000+ apps.
Pro Tip: Try integrating different Zapier tools to expand functionality. Each added connection increases the flexibility and power of your automation workflows.
Editorial Staff
The Editorial Staff at AIChief is a team of Professional Content writers with extensive experience in the field of AI and Marketing. AIChief was Founded in 2025, AIChief has quickly grown to become the largest free AI resource hub in the industry. Stay connected with them on Facebook, Instagram and X for the latest updates.


