AI Tutorial
Install and Run Your Own Autonomous Agent With OpenClaw
Learn how to install OpenClaw (formerly Moltbot) and set up your own autonomous AI agent with messaging, automation, and deployment capabilities.
Share
In this guide, you’ll learn how to install and configure your own autonomous agent using OpenClaw. The system improves over time with usage. Within a few days, it can handle tasks like generating images, replying to emails, and deploying websites independently.
Note: This project was originally called Moltbot and is now known as OpenClaw. Refer to official documentation if needed.
Who This Helps
- Anyone with a computer and access to AI tools
- Tinkerers exploring autonomous agents
- Users looking for a proactive AI assistant
What You’ll Create
A self-operating AI agent capable of handling tasks, communicating via messaging platforms, and managing workflows.
What You Need Before Starting
- ChatGPT Plus ($20/month) or equivalent (Gemini or Claude)
- A MacBook (Linux/Windows possible, but optimized for Mac)
Security Note: This is experimental open-source software. Do not install it on your main machine. Use a secondary device or ensure you have a full backup before proceeding.
Step 1: Collect API Keys and Credentials
Before installation, gather the required keys:
- Create an account with Brave Software and obtain an API key (for search functionality)
- Generate an API key from your chosen AI provider (OpenAI, Claude, or Gemini)
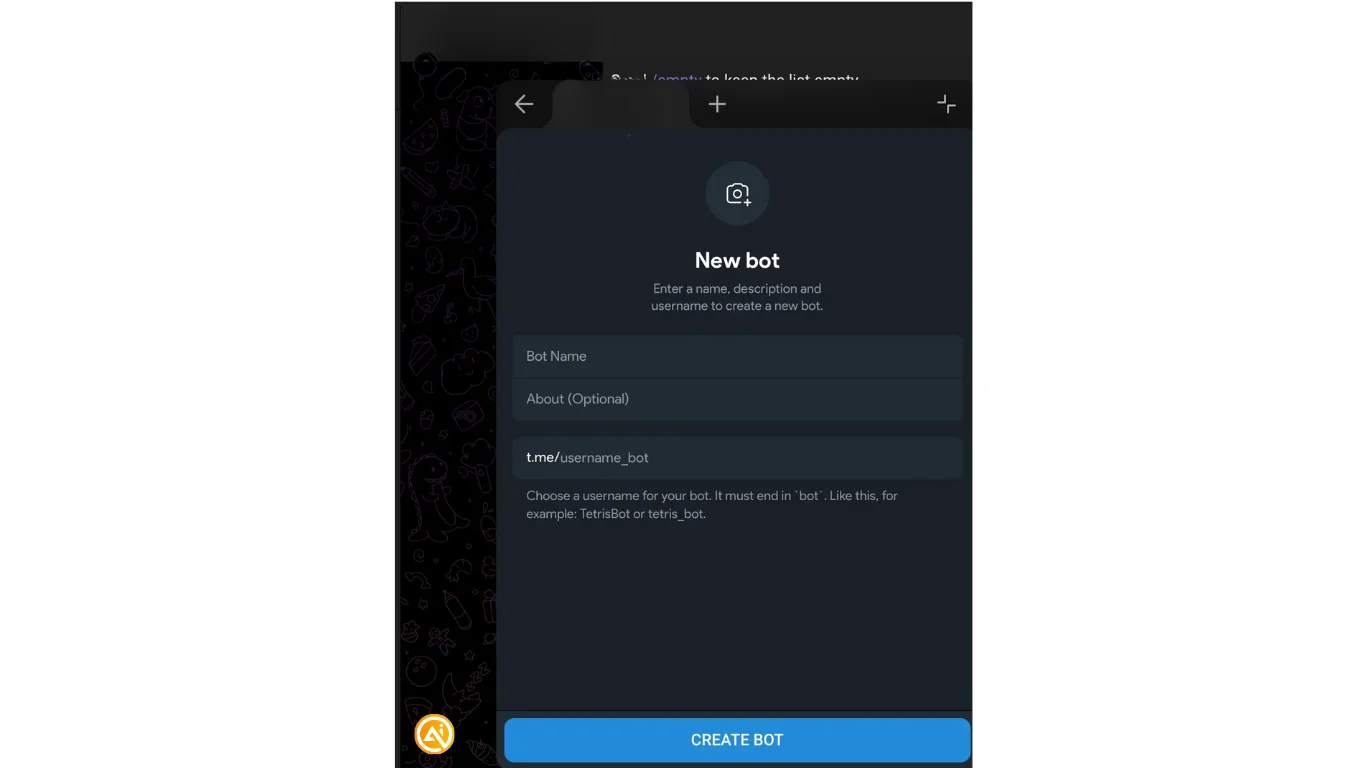
- Open Telegram and search for “BotFather”
- Start a chat and create a new bot with a name and a handle ending in “bot”
Save the bot token provided, you’ll need it during setup.
Step 2: Install and Configure OpenClaw
Ensure Node.js (version 22 or higher) is installed.
Install the CLI:
"curl -fsSL https://openclaw.bot/install.sh | bash"
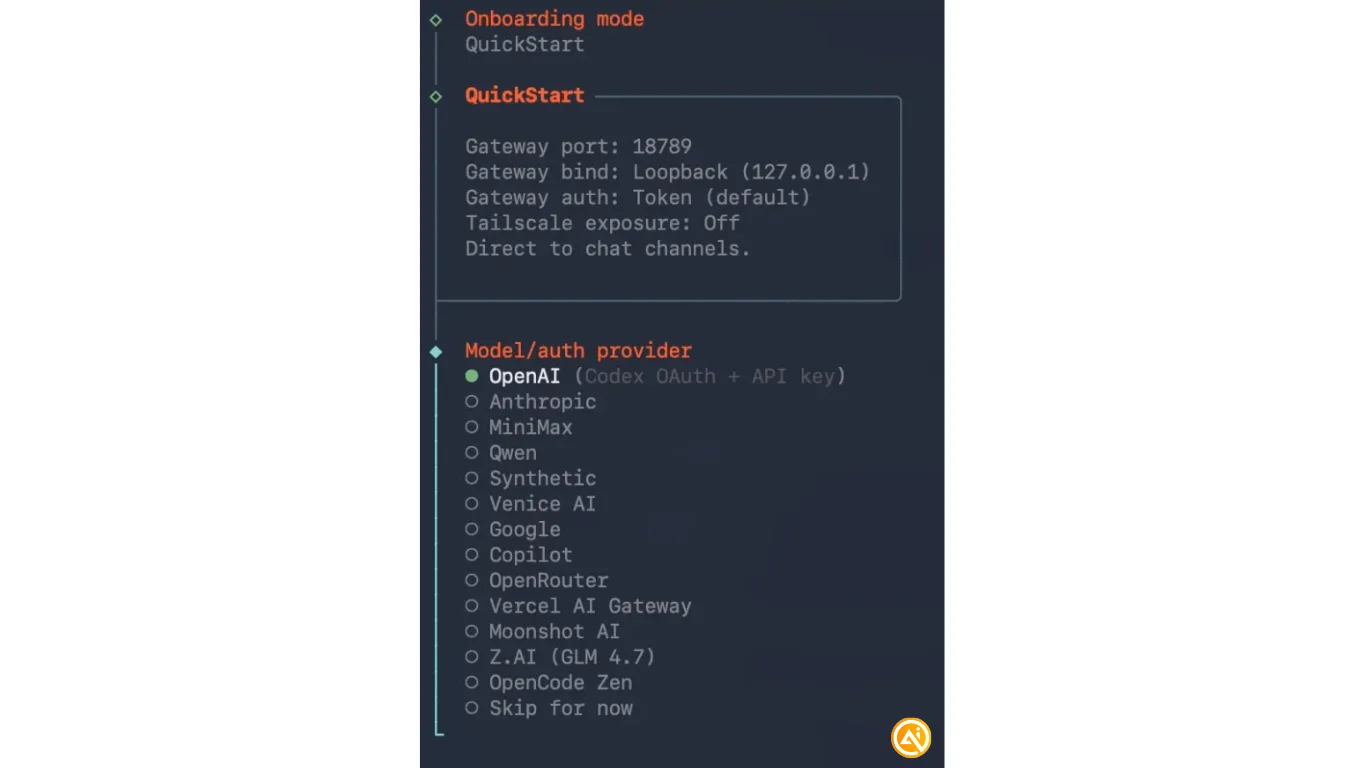
Run the onboarding process:
sudo openclaw onboard --install-daemon
Recommended setup:
- Choose Quickstart
- Select your AI provider and paste your API key
- Enable Brave search and provide its API key
- Choose Telegram as your communication channel
- Skip optional APIs like Google Places
- Enable all hooks to improve memory over time
Tip: Start simple, add features gradually instead of installing everything at once.
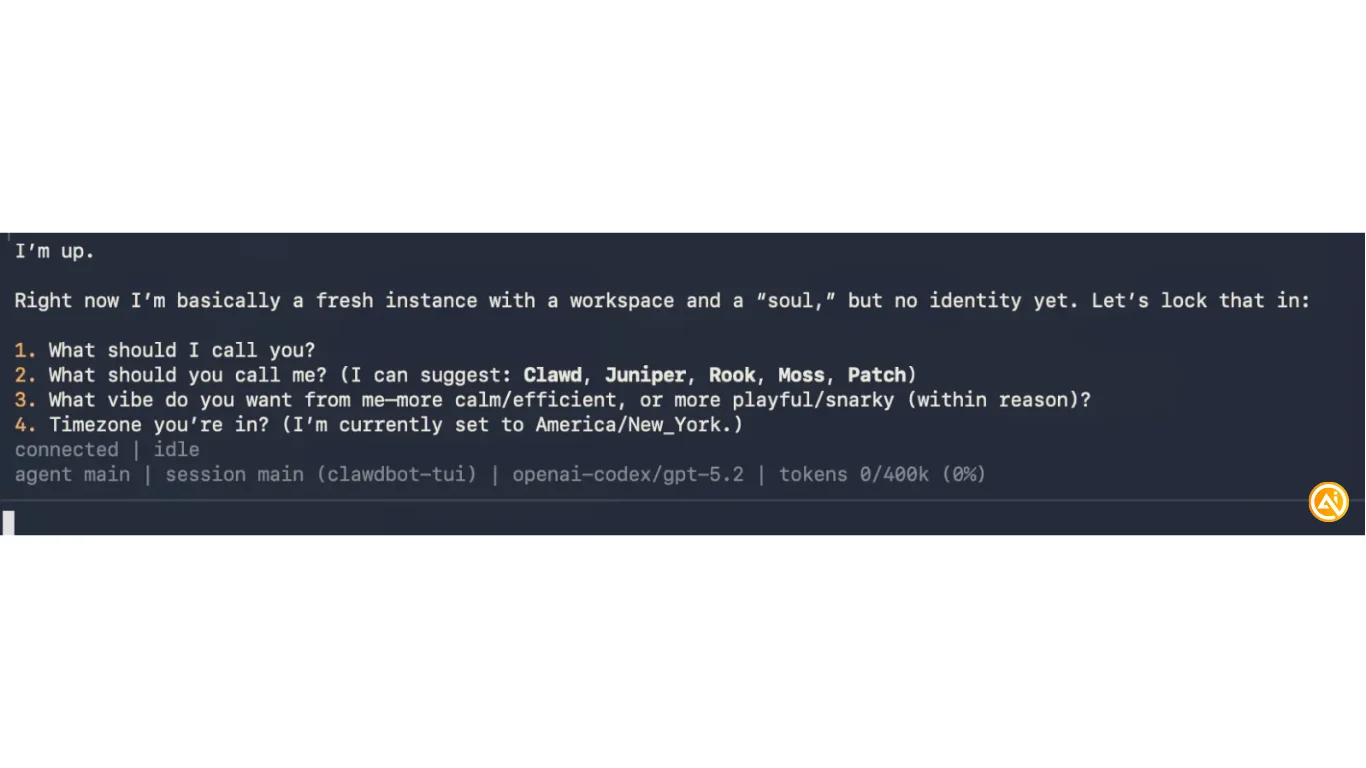
Step 3: Complete Initial Setup
After onboarding, you’ll enter the introduction wizard. At this point, your OpenClaw agent is active and ready to interact.
Step 4: Connect via Telegram
Search for your bot’s username on Telegram and send it a message. It will return a pairing code.
In your terminal, run:
openclaw pairing approve telegram <CODE>
Replace <CODE> with your pairing code.
You can now communicate with your agent through Telegram.
Tip: If the command fails, try using clawdbot or moltbot instead of openclaw.
Next Steps
- Provide a Gemini API key and ask your agent to generate a custom avatar
- Set up daily reports (e.g., weather updates and task planning)
- Connect an email inbox for monitoring messages
- Link to GitHub to enable automatic website deployment via GitHub Pages
Over time, your agent can expand into a fully automated assistant managing multiple workflows.
Emily Newton
Emily Newton is an experienced Editor-in-Chief who has spent the last decade sharing her insights on science and technology advances through platforms like IoT for All and DZone. She is deeply interested in showcasing how connected technologies and smart ecosystems transform modern businesses. When she isn’t writing, Emily enjoys walking local trails, playing video games, or curling up with a good book.


