AI Tutorial
How to Create a Simple Productivity Tracker with Replit Using AI
Learn how to create a lightweight productivity tracking app with Replit using an AI interview method. Track daily work and generate weekly reports effortlessly.
Share
This guide explains how to build a lightweight productivity tool that tracks your daily output and turns it into structured weekly summaries. Instead of jumping straight into development, the process begins with AI helping you define what actually matters in your workflow, then using that insight to generate your app.
Who This Is Ideal For
- Managers and operators who need clear weekly updates without relying on memory
- Client-facing professionals handling calls, deliverables, and follow-ups
- Anyone managing many small tasks who wants a simpler alternative to time tracking
What You’ll Build
You’ll create a minimal but functional tracking app that includes:
- Daily inputs for task counts
- Optional notes for context
- A visual calendar heatmap
- A report generator for weekly or custom summaries
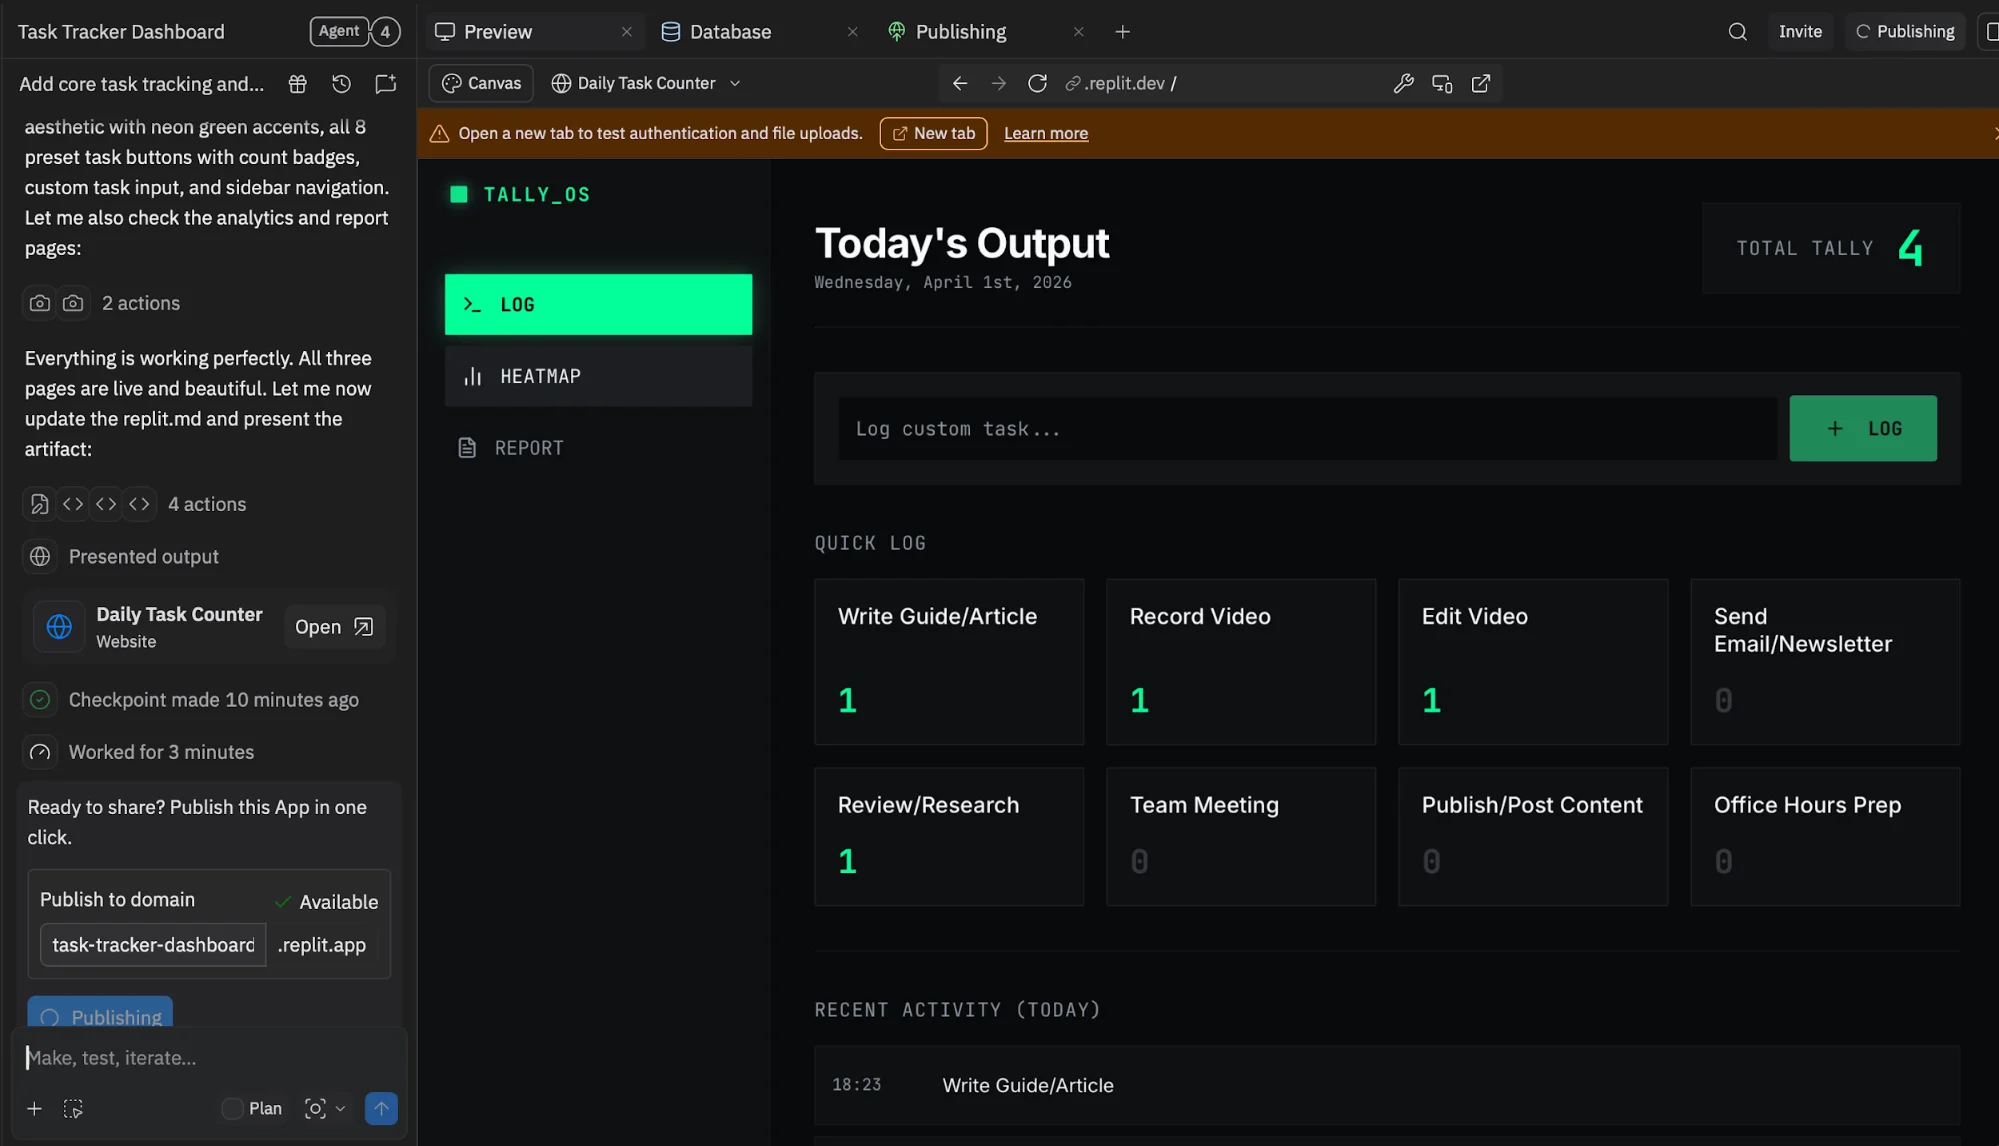
The result is a tool you can update in seconds and use for reporting or reflection.
What You Need to Get Started
- An account with an AI assistant like ChatGPT or Claude
- A Replit account
- A general idea of the types of work you do regularly
A basic Replit plan is enough to build and deploy your first version.
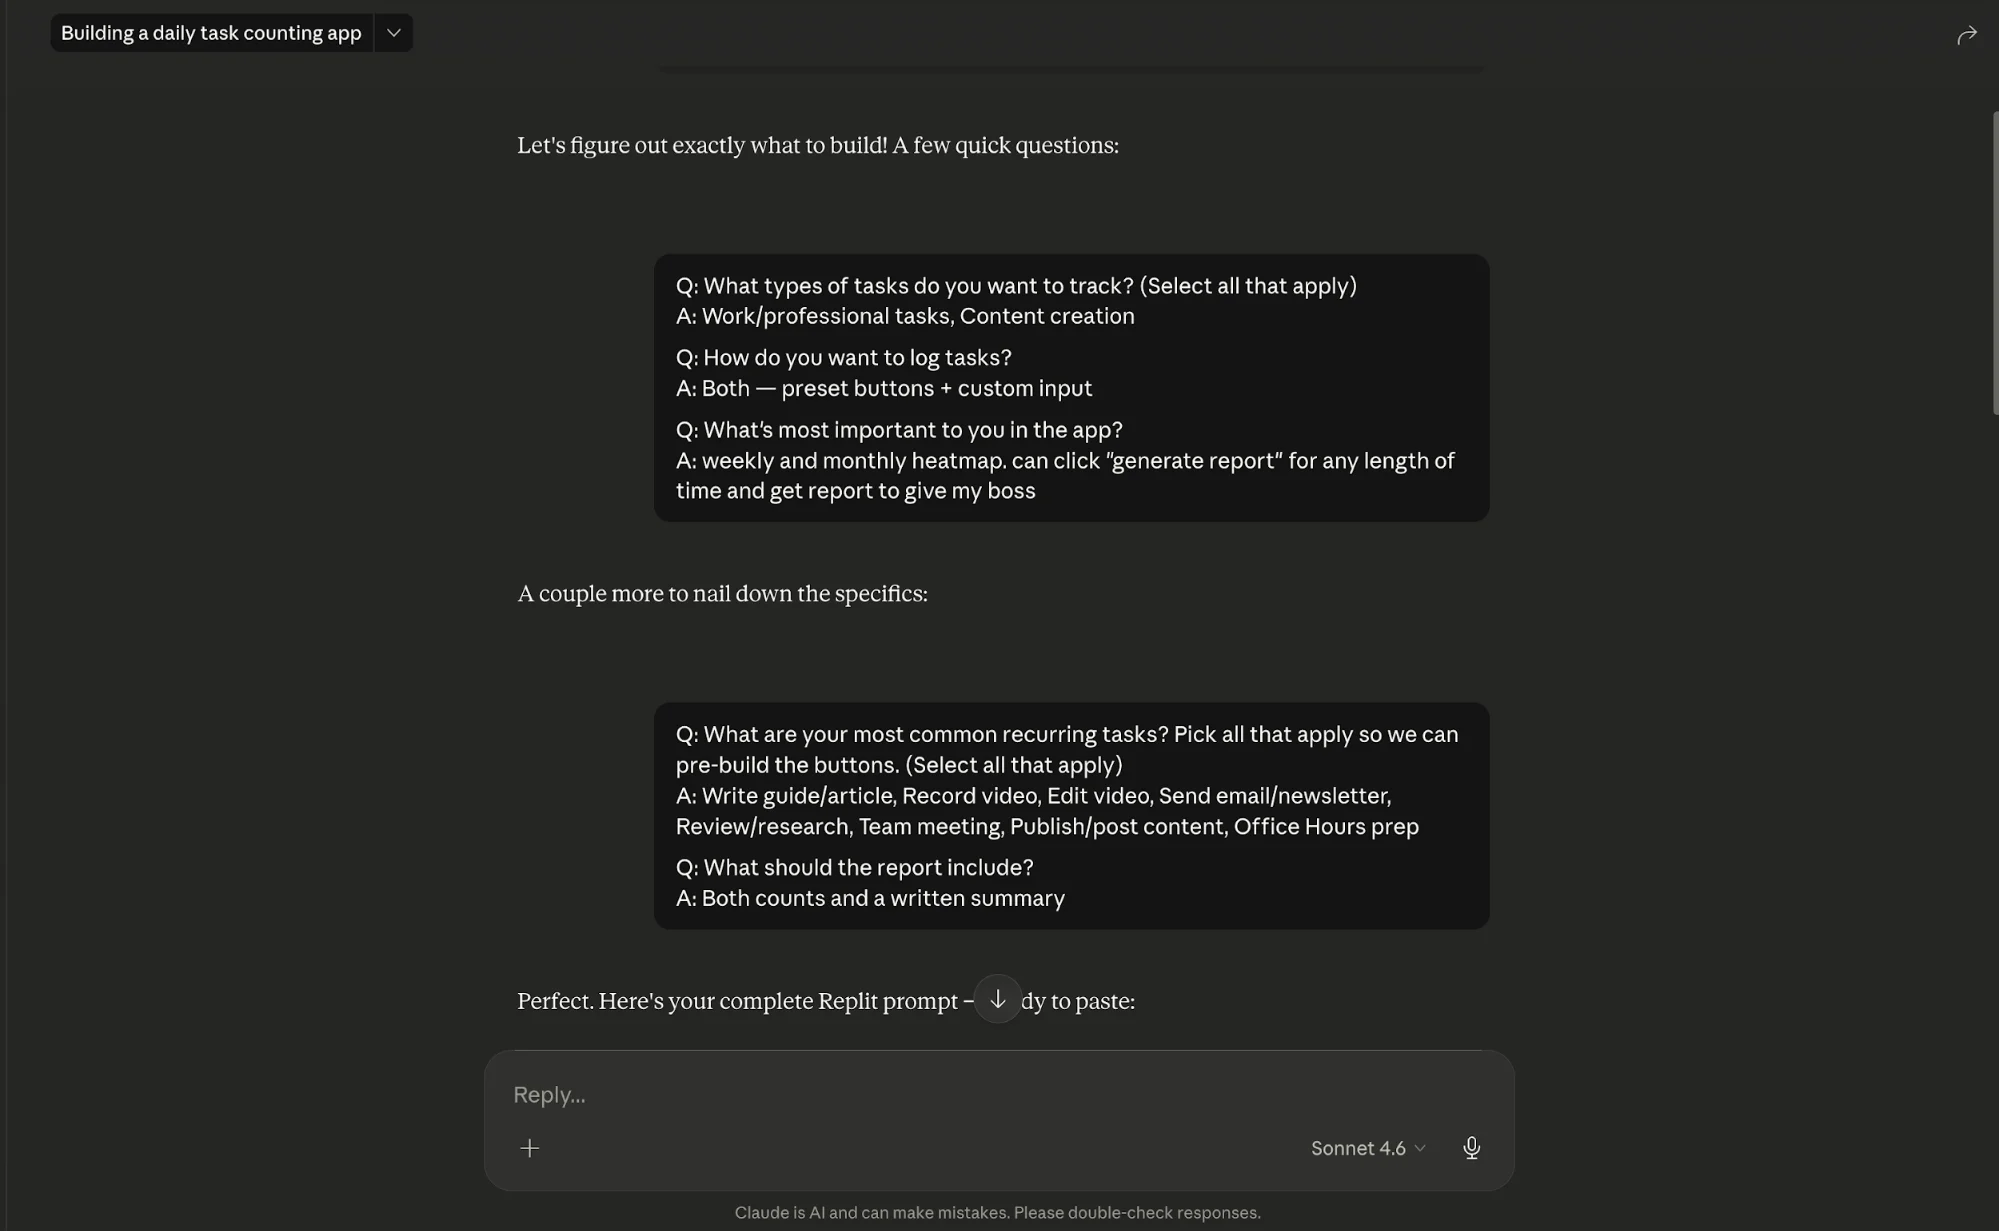
Step 1: Use AI to Define What to Track
Begin by asking an AI assistant to interview you about your daily work.
For example:
“Interview me about my daily tasks so I can build a task tracking app.”
The AI will ask questions and identify categories such as:
- Calls
- Deliverables
- Meetings
- Client responses
- Content output
The goal is to create clear, countable categories. Specific labels (like “proposal sent”) are much more useful than vague ones (like “admin”).
Step 2: Generate the App in Replit
Take the prompt created by the AI and paste it into Replit. Request a simple app with:
- Numeric inputs for daily tasks
- A notes field
- A calendar-style visualization
- A reporting feature
You don’t need perfection, just something usable. In many cases, a working version can be generated within minutes.
Step 3: Test the System with Sample Data
Before using real data:
- Enter a few days of sample activity
- Check how the tracker displays results
This helps confirm everything works and makes the system feel tangible. Keep usage simple:
- Enter task counts
- Add notes if needed
- Save and move on
If it takes more than half a minute per day, it’s unlikely to stick.
Step 4: Generate Reports
Once you have data, use the report feature to create summaries. A useful report should show:
- Total tasks completed
- Daily averages
- Most productive days
- A short written summary
This turns your tracked activity into ready-to-share updates.
Step 5: Build a Daily Habit
Consistency is what makes the tool valuable. A simple routine:
- Open the app at the end of your workday
- Log your numbers
- Add one quick note if needed
This replaces the need to reconstruct your week from scattered sources like emails or chats.
Going Further
Once your basic tracker is working, you can improve it by:
- Adding project or client tags for filtered reports
- Including simple login functionality
- Expanding reporting features
The goal isn’t complexity, it’s usefulness. Start small, then refine based on how you actually use the tool.
This approach shifts productivity tracking away from time logging and toward meaningful output, giving you a clear, structured view of what you accomplish each week.
Editorial Staff
The Editorial Staff at AIChief is a team of Professional Content writers with extensive experience in the field of AI and Marketing. AIChief was Founded in 2025, AIChief has quickly grown to become the largest free AI resource hub in the industry. Stay connected with them on Facebook, Instagram and X for the latest updates.


