AI Tutorial
How to Create a Cohesive Product Photo Set Using Grok AI (for Free)
Learn how to generate a full set of professional product images using Grok AI. Create cohesive, high-converting visuals without a photoshoot.
Share
This guide explains how to use Grok’s Aurora model to generate a complete set of product images that look like they came from the same professional shoot. Instead of creating isolated visuals, you’ll build each image from a shared foundation to maintain consistency across your entire set.
Who This Is For
- Online sellers who want high-quality product images without paying for expensive photo shoots
- E-commerce marketers managing multiple products who need consistent visuals across listings
- Entrepreneurs testing new products who need professional-looking imagery before investing in production
What You’ll Create
You’ll generate a set of 5–6 product images that mirror what high-performing listings typically use:

- A clean hero image
- A styled studio shot
- Alternate angles
- Close-up detail shots
- A lifestyle image
- A flat lay composition
All of these will be created from a single photo of your product.
What You Need
- A photo of your product (a simple phone image works fine)
- A free account on Grok
- Optional: a paid plan for higher generation limits
Access note:
Free users can generate a limited number of images daily, while paid tiers allow for significantly more prompts. Limits may vary over time.
Step 1: Create Your Base (Anchor) Image
Go to Grok and upload your product image. Your first goal is to generate a polished studio-style shot that will serve as the reference for all other images.
Think of your prompt like instructions you would give a professional photographer.
Example Prompt
Product photo of [your product] on a matte black surface, soft lighting from the upper left, subtle shadow, dark gradient background, shot with an 85mm lens, shallow depth of field, clean commercial style
This first image becomes your “anchor” the visual standard for lighting, color, and composition.
Tip:
Adjust background colors and surfaces to align with your brand identity.
Step 2: Expand with Consistent Studio Shots
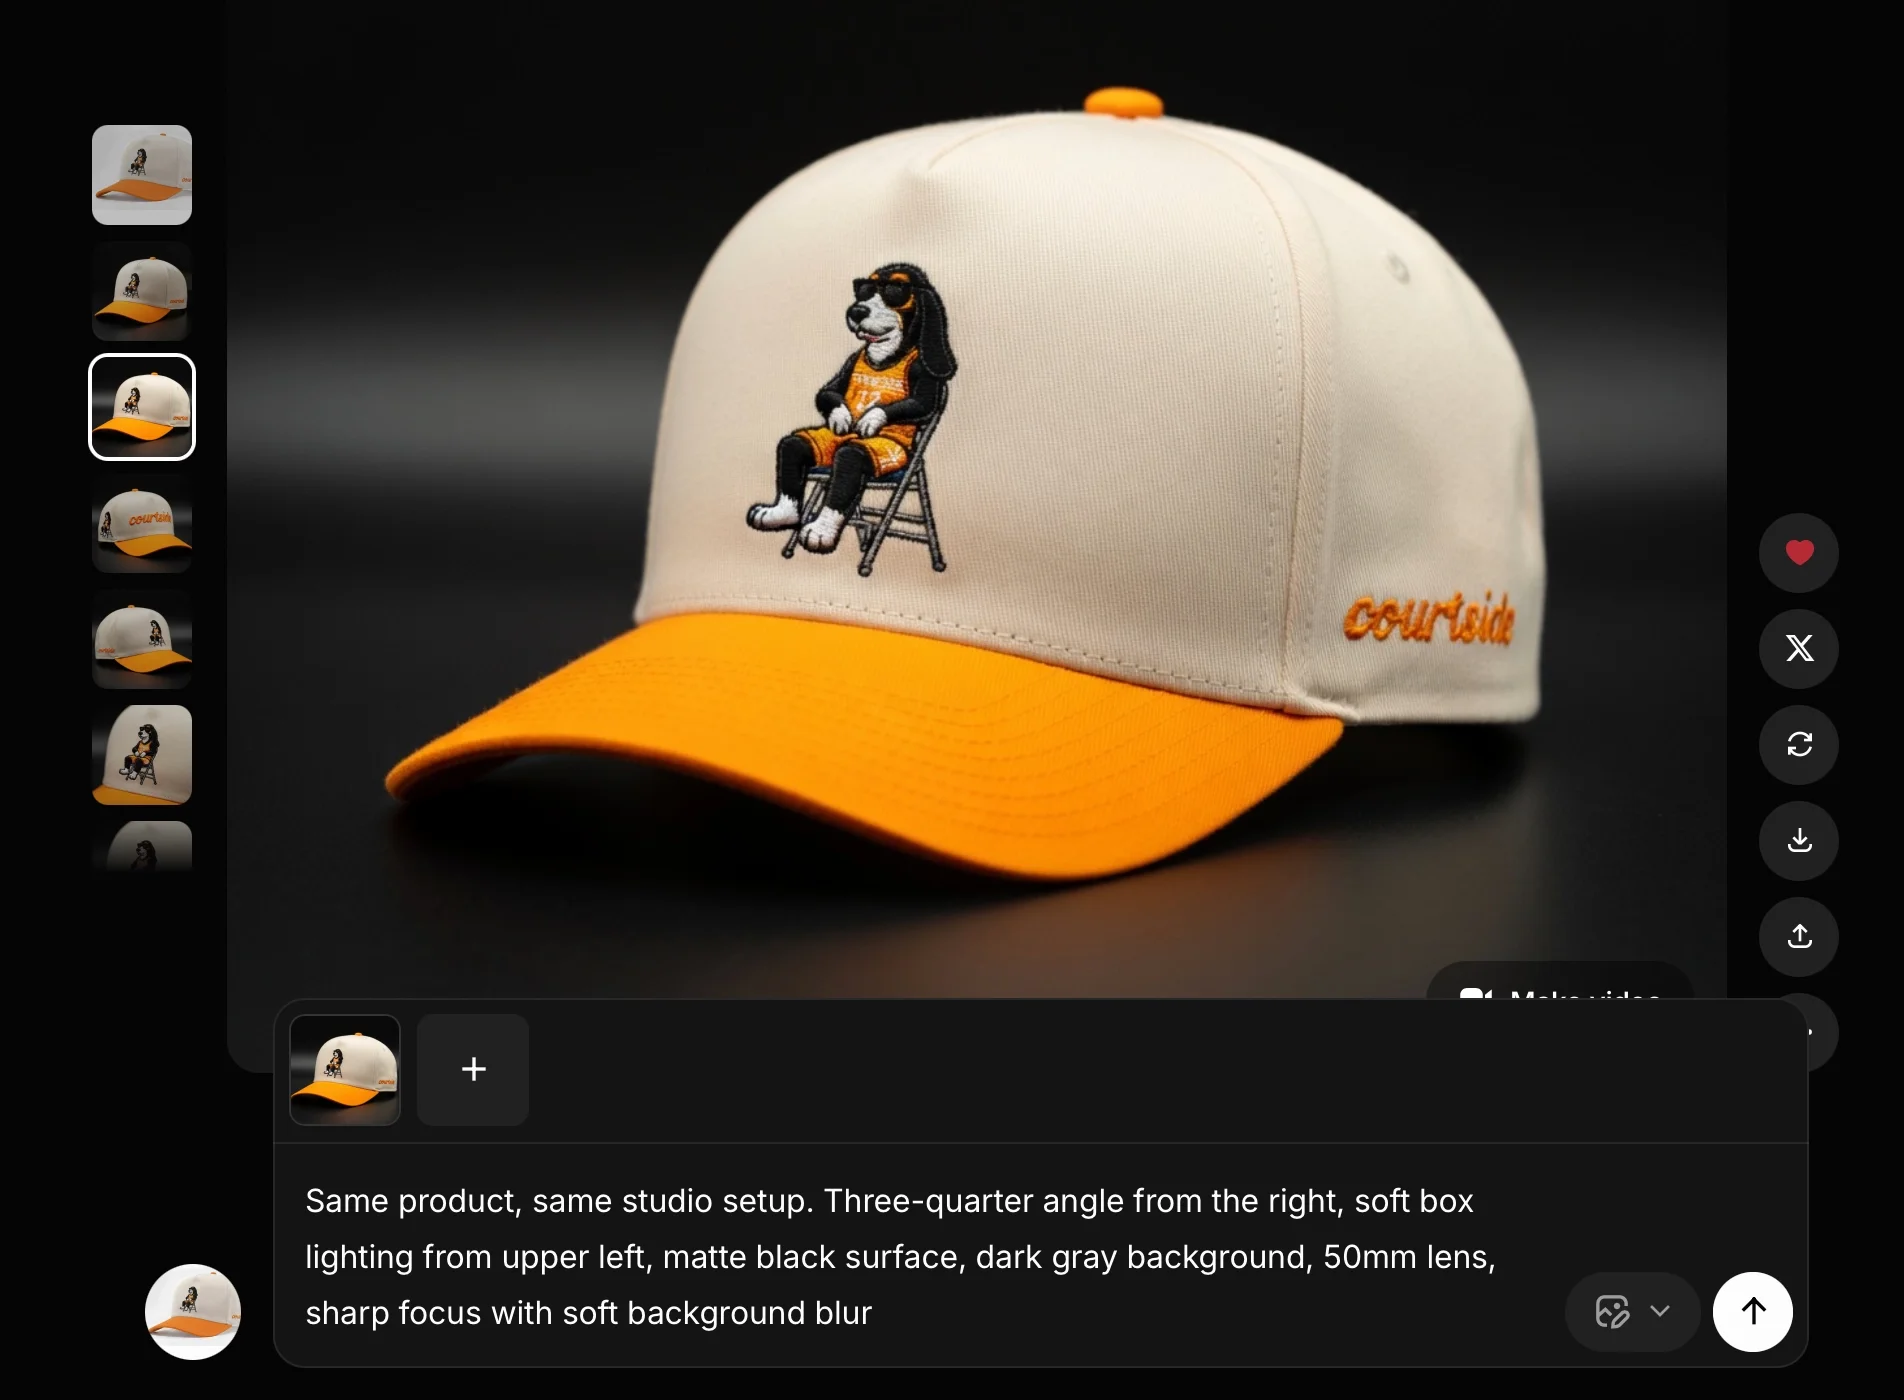
To maintain consistency, use the anchor image as the reference for all future generations. This ensures the environment stays the same across every shot.
Additional Angles
Three-quarter angle:
Same product, identical studio setup. Slight angle from the right, consistent lighting and background, medium lens, sharp subject with soft background blur
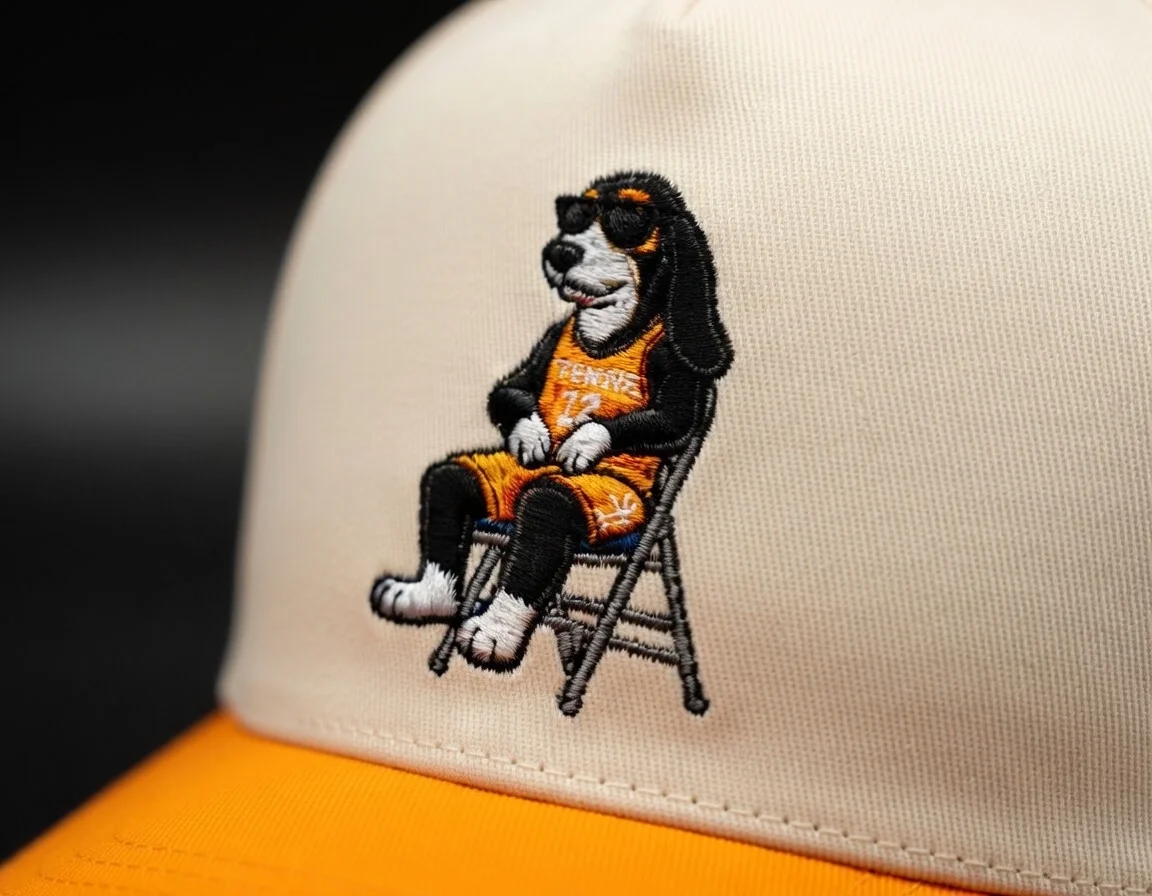
Close-up detail:
Macro shot focusing on a key feature of the product, with soft directional lighting and the same studio environment
Replace details like “texture” or “logo” with features specific to your product.
When placed side by side, these images should feel like part of a single shoot, same lighting, same mood, different perspectives.
Step 3: Add Lifestyle and Context Images
Now expand beyond studio shots to include more dynamic visuals that show the product in use.
Lifestyle Shot
A person interacting with or using the product, maintaining a consistent style and tone with your brand
Adapt the setting and style to match your audience (e.g., sporty, minimal, luxury, etc.).
Flat Lay
An overhead composition with the product placed alongside complementary items
Choose props that make sense for your product and reinforce its use case or audience.
Tip:
Keeping color tones consistent (warm or cool) across these images helps maintain a unified look.
Another useful trick is to specify camera details in your prompts. Mentioning a camera model and lens often improves realism.
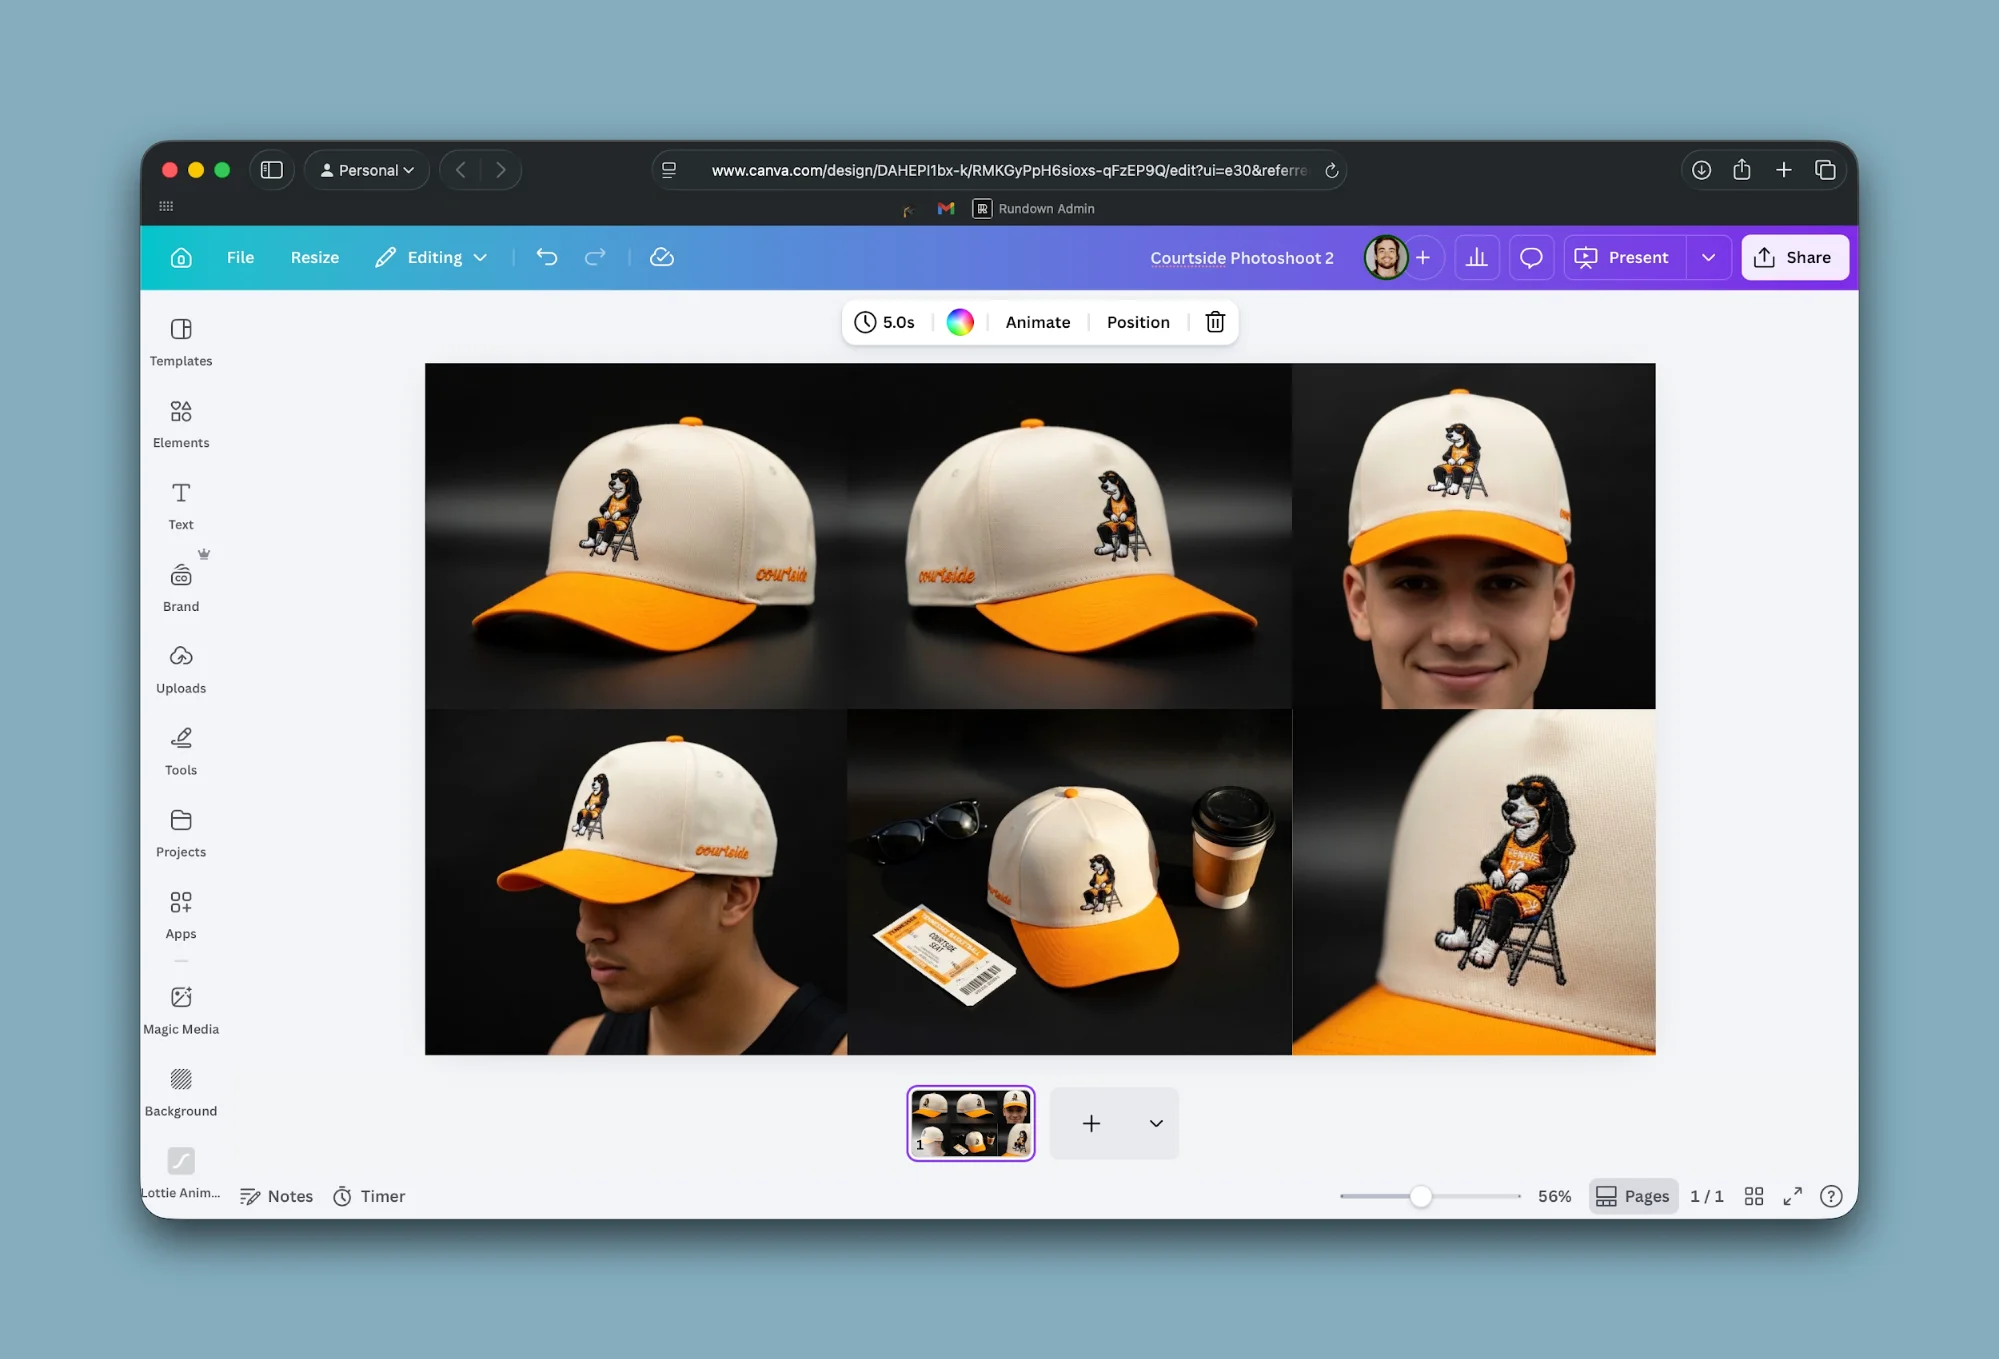
Step 4: Review and Assemble
Once all images are generated:
- Place them together in a design tool like Canva
- Adjust spacing, cropping, and alignment
- Ensure consistency across colors and lighting
At this stage, you’ll have a complete product image set ready for your store, ads, or social content.
Advanced Ideas
- Seasonal variations:
Once your prompts are refined, you can reuse them with different backgrounds, lighting, or color schemes to match seasonal campaigns. - Scale across your catalog:
Apply the same prompt structure to multiple products to maintain a consistent brand identity across your store. - Add informational overlays:
Use your clean studio images as a base, then layer in text, measurements, or feature highlights for additional listing images.
Final Thoughts
This workflow allows you to produce professional, cohesive product imagery without a traditional photoshoot. By anchoring every image to a consistent base, you ensure your visuals feel unified and polished—something that plays a big role in conversion and brand perception.
Editorial Staff
The Editorial Staff at AIChief is a team of Professional Content writers with extensive experience in the field of AI and Marketing. AIChief was Founded in 2025, AIChief has quickly grown to become the largest free AI resource hub in the industry. Stay connected with them on Facebook, Instagram and X for the latest updates.


