AI Tutorial
How to Build Your First AI-Powered Workflow in Google Workspace Studio
Learn how to create an automated workflow in Google Workspace Studio that processes form responses, logs data, and sends notifications using AI.
Share
This guide walks you through creating an automated workflow in Google Workspace Studio that handles incoming form submissions. The system will analyze responses, store key details, evaluate them, and notify you when action is required, all without manual effort.
Who This Is For
- Freelancers and agencies managing inbound leads
- Operations teams handling internal requests or support tickets
- Anyone using Google Workspace who wants automation without external tools
What You’ll Build
An automated system that:
- Triggers when a form is submitted
- Uses AI to interpret and summarize responses
- Logs key information into a spreadsheet
- Evaluates submissions based on defined criteria
- Sends notifications for relevant entries
Requirements
- A Google Workspace or Gmail account
- A Google Form
- Optional: A Google Sheet for tracking responses
Step 1: Set Up Your Form
Create a Google Form tailored to your use case.
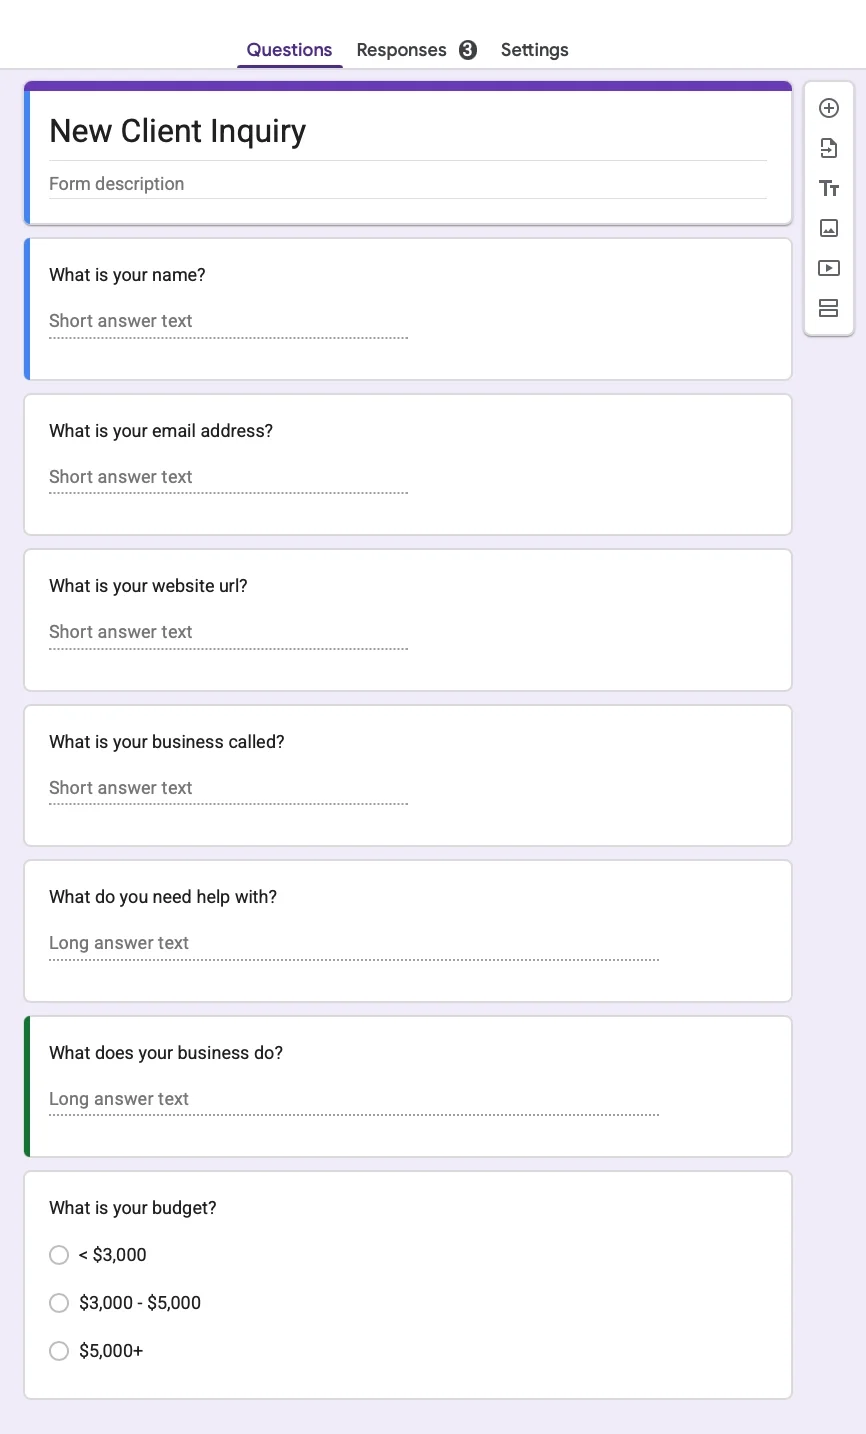
Examples include:
- Lead capture forms
- Support request forms
- Internal process requests
Ensure the form is saved and clearly named so it can be connected later.
Step 2: Create a New Workflow
Open Workspace Studio and start a new flow.
- Select the trigger: When a form response is received
- Choose your form
- Leave additional trigger options (like edits) disabled for simplicity
Step 3: Add an AI Summary
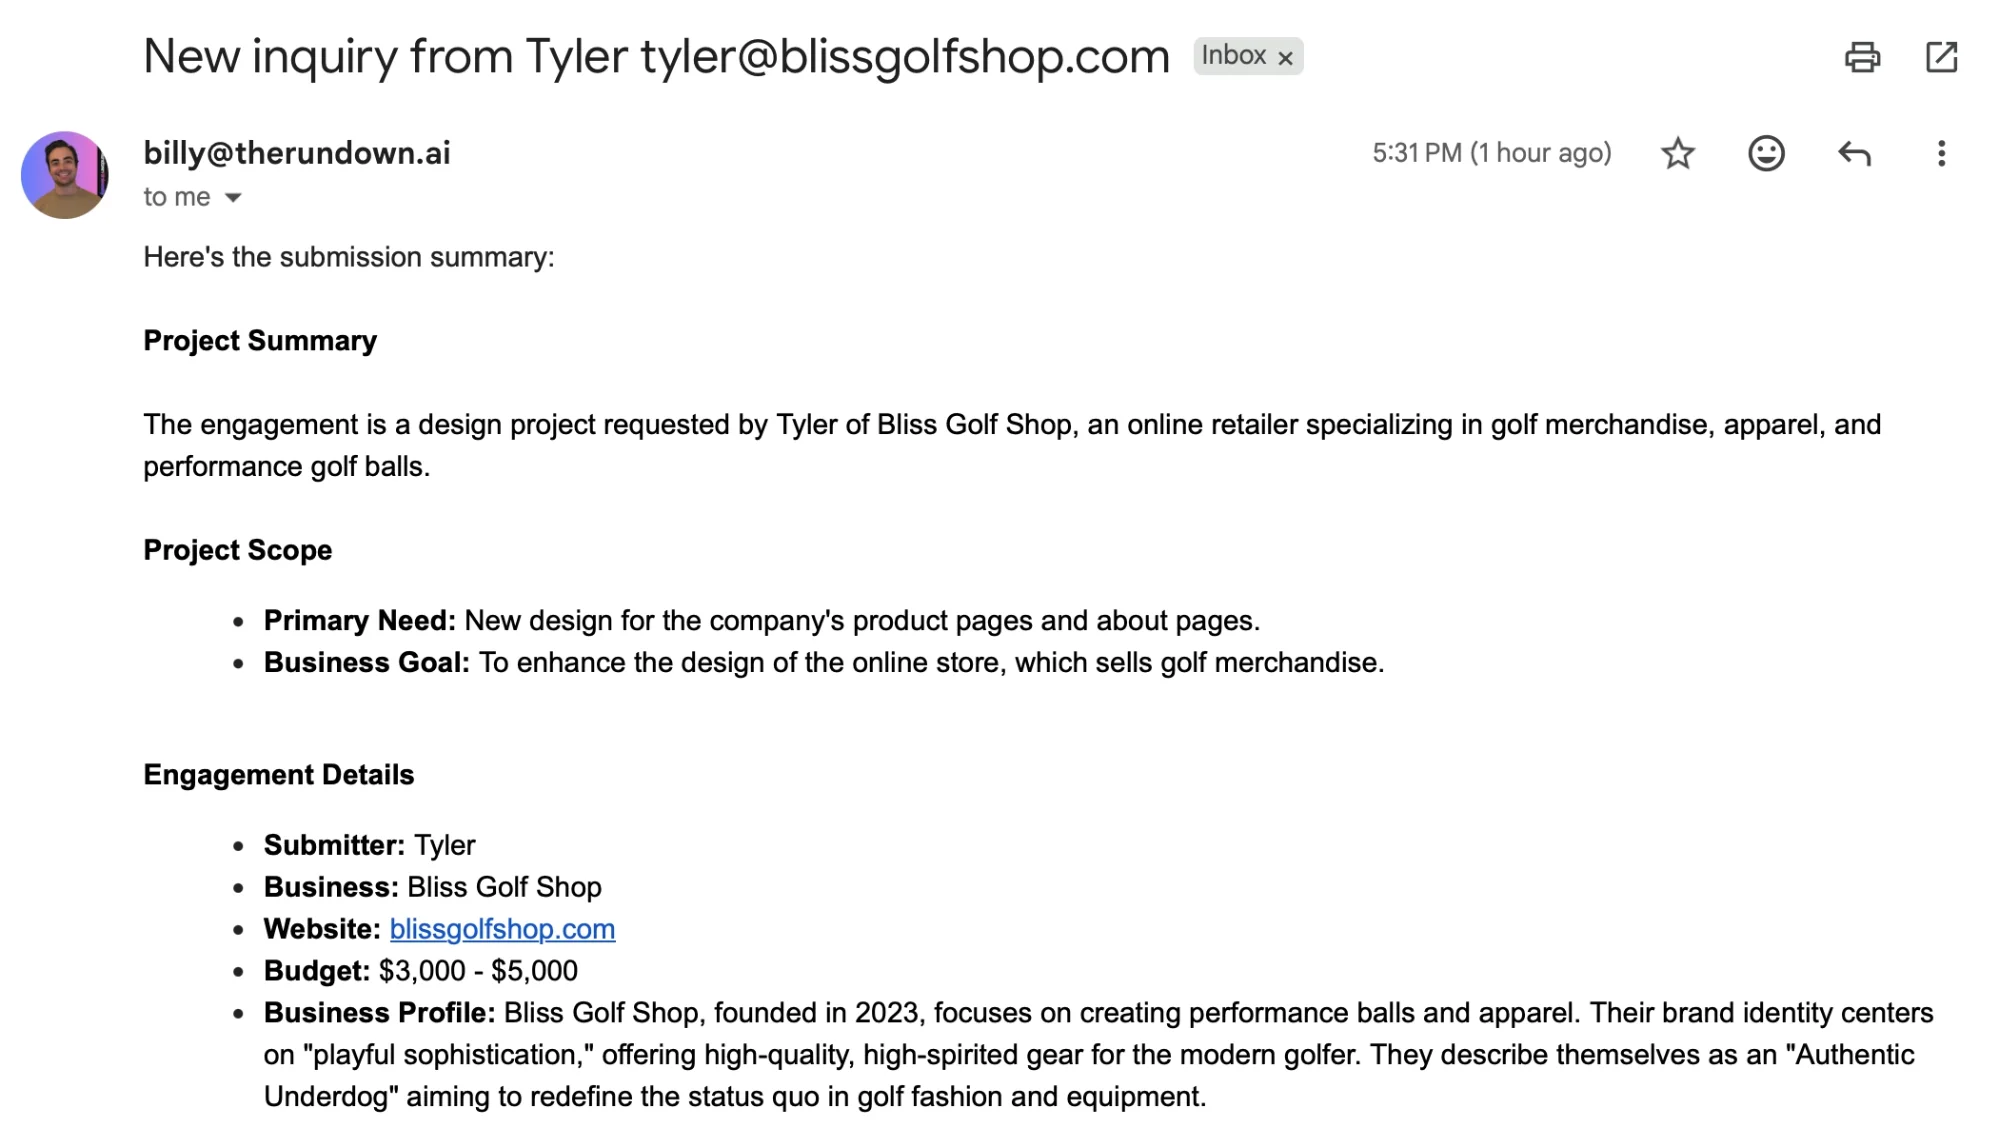
Insert a step that uses AI to summarize the form response.
Provide context to improve accuracy.
Example Instruction
Review this submission and summarize it as a potential client request.
We focus on web design projects with an average budget of around $4,500.
Clear instructions help produce more useful summaries.
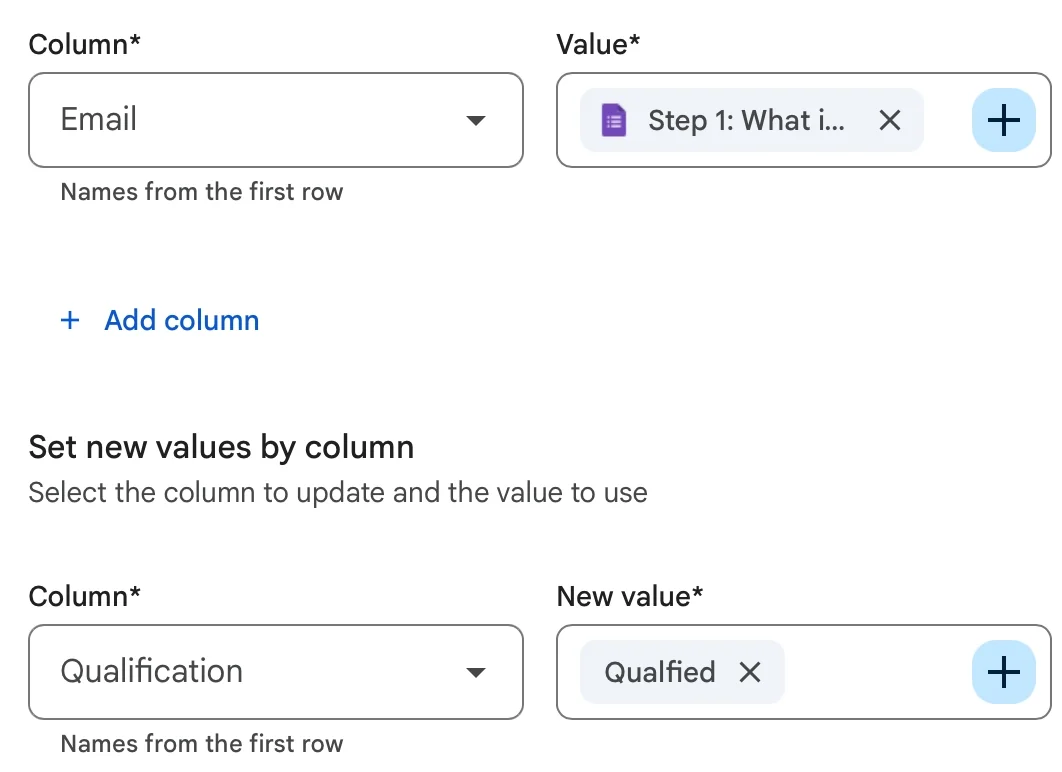
Step 4: Save Data to a Spreadsheet (Optional)
Add a step to record information in a Google Sheet.
Include:
- Name and email from the form
- AI-generated summary
- Link to the original response
This creates a streamlined record of submissions without unnecessary clutter.
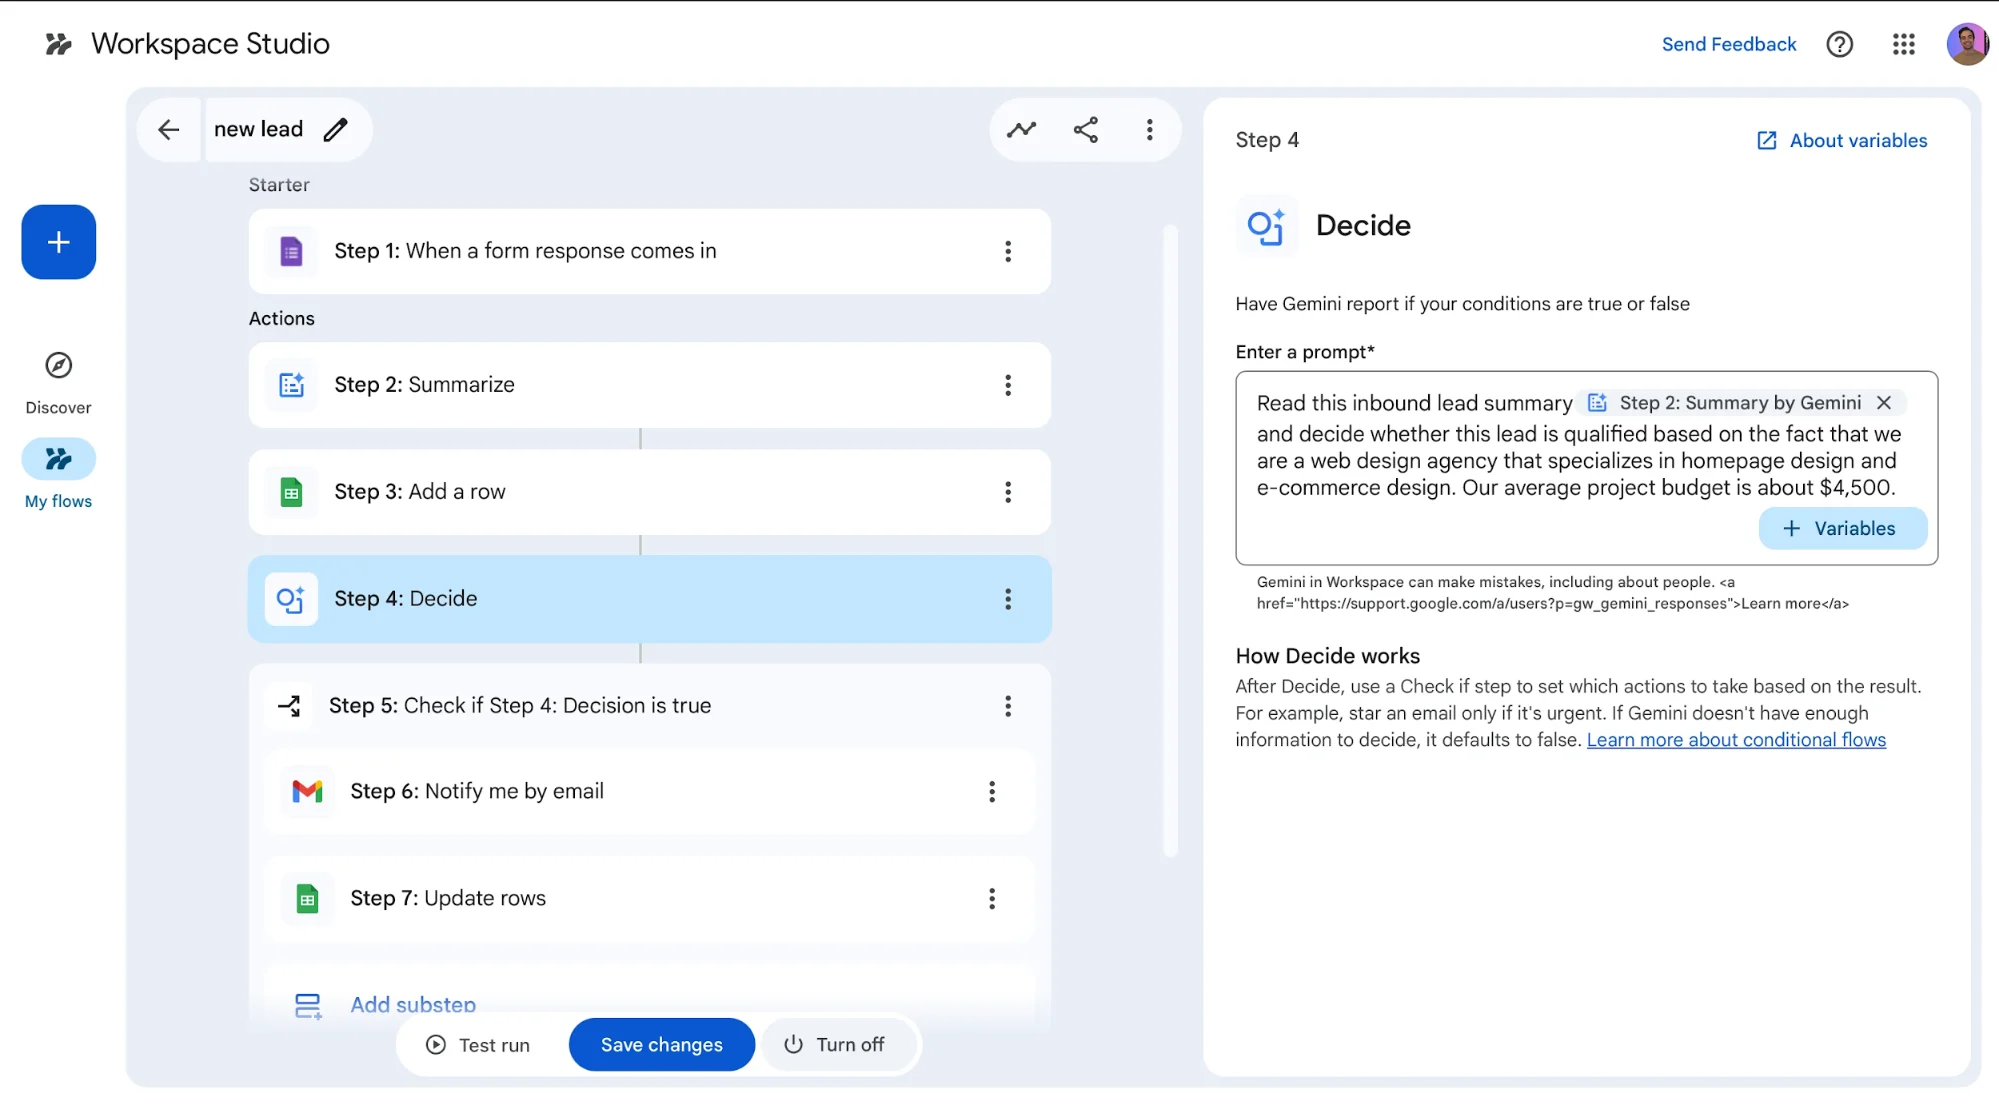
Step 5: Add a Decision Step
Use an AI-based decision step to evaluate each submission.
Example Instruction
Determine whether this submission meets our criteria based on our services and typical project scope.
This creates two outcomes:
- Meets criteria
- Does not meet criteria
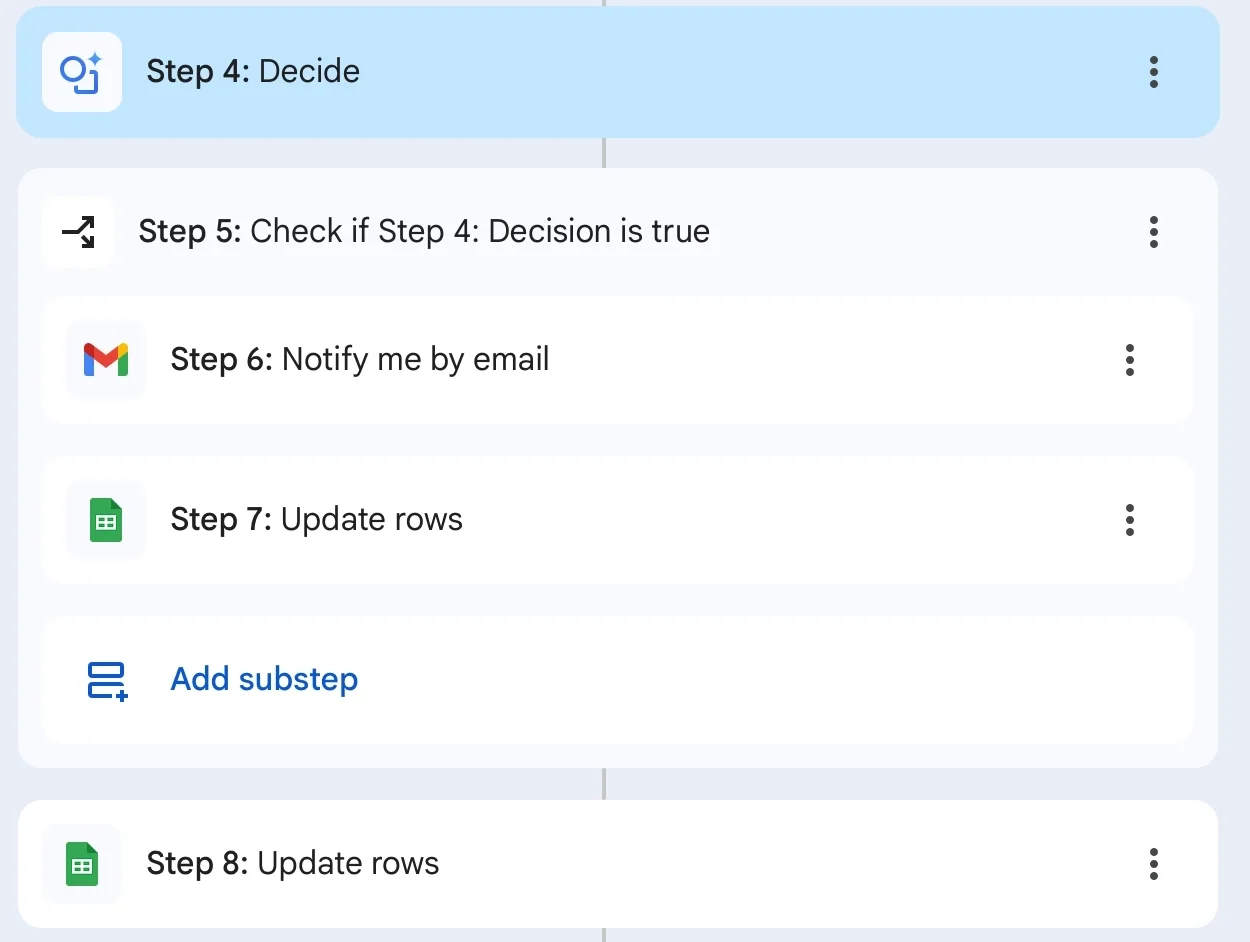
Step 6: Configure Notifications
For qualifying submissions, set up an email alert.
Include:
- A clear subject line
- Key details from the submission
- A link to the original form response
You can also update your tracking sheet to label each entry accordingly.
Step 7: Test and Activate
Turn on the workflow and submit a test response.
- Allow a few minutes for processing
- Review the activity log to confirm each step
- Verify that summaries, decisions, and notifications are working
You can also re-run previous submissions for testing.
Advanced Use Cases
Once your workflow is running, you can expand it further:
- Client onboarding: Automatically create folders and documents
- Support routing: Categorize and assign requests by urgency
- Response drafting: Generate replies for review before sending
Final Thoughts
This workflow transforms repetitive manual tasks into an automated system. Instead of reviewing every submission yourself, you can focus only on the ones that matter, saving time and improving efficiency.
Editorial Staff
The Editorial Staff at AIChief is a team of Professional Content writers with extensive experience in the field of AI and Marketing. AIChief was Founded in 2025, AIChief has quickly grown to become the largest free AI resource hub in the industry. Stay connected with them on Facebook, Instagram and X for the latest updates.


