AI Tutorial
Create Marketing & Ad Videos Efficiently with Remotion
Learn how to programmatically create ads and marketing videos using Remotion, AI tools, and automation in minutes.
Share
This guide walks through how to produce ads and marketing videos through code. With this workflow, you can ideate, template, and generate dozens of videos in minutes while using only a small amount of tokens.
Who This Helps
- Marketers are testing different hooks and CTAs
- Business owners looking to automate content creation
- Anyone who quickly exhausts Sora tokens
Getting Started
- A code editor (we use Cursor)
- Codex, Claude Code, or Cursor Agent (we use Codex)
Step 1: Generate Video Concepts
Open your preferred AI chat tool; NotebookLM is recommended.
Upload screenshots of your website and products as sources, and include a link to your website.
You can also add YouTube links that match the style of video you want to create.
Ask NotebookLM to generate five promotional video ideas for your brand, then refine them as needed.
Step 2: Create Setup Prompt for Codex
Use this prompt:
“Give me a prompt to guide Codex in setting up my repository and outlining a plan to build all components and produce those videos with Remotion. Use Remotion Codex for styling.”
You can replace Codex with Claude Code or Cursor if preferred. The Remotion Skill supports these options as well.
Step 3: Initialize the Project
Open your terminal and run:
npx create-video@latest
Follow the prompts to configure and name your project. For this example, choose the hello world template.
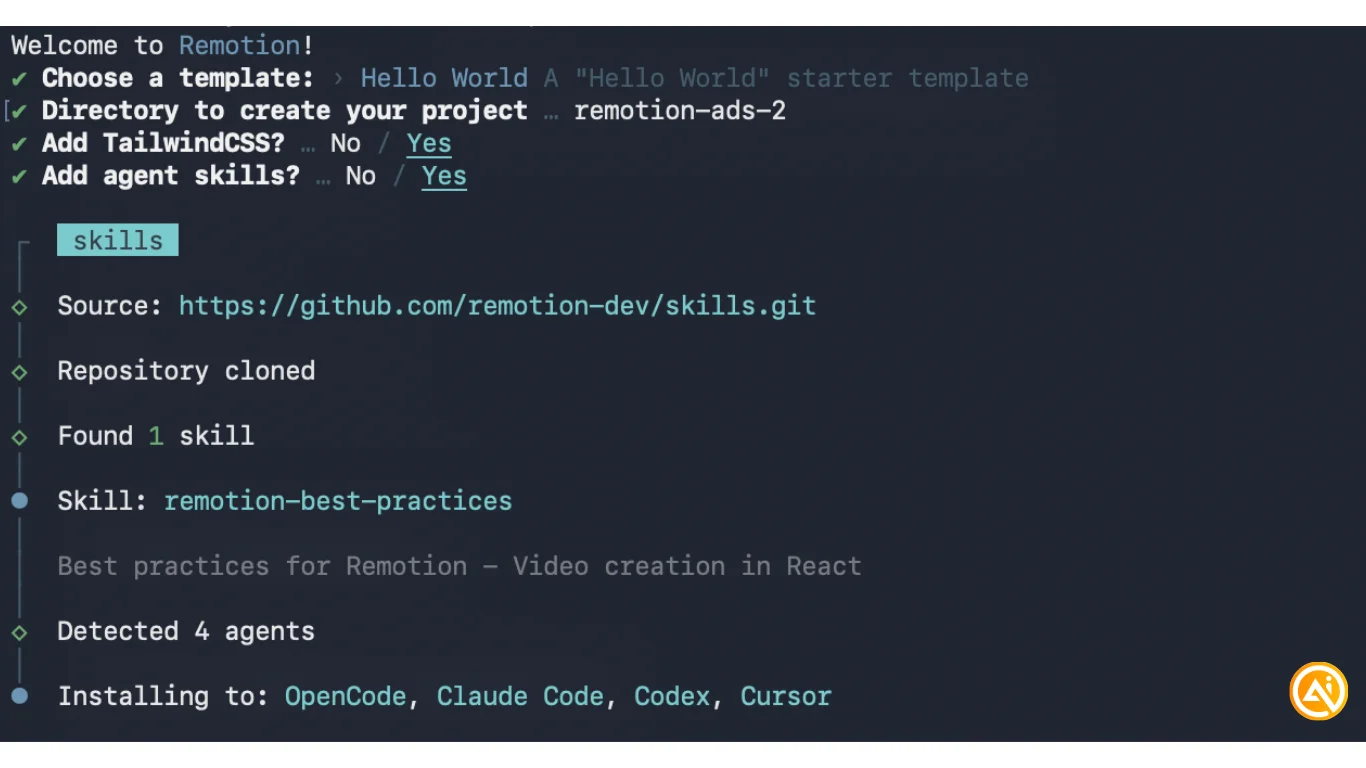
At the end, install the Remotion skill by pressing enter. Alternatively, install it manually using:
npx skills add remotion-dev/skills
Press enter again to open the project in your code editor.
Step 4: Install Dependencies & Build Components
Run the following commands to install dependencies and start the editor:
npm install
npm run dev
Add the markdown instructions from Step 1 into the root of your project. Initialize a new Git repository using git init to provide better context for Codex.
Then prompt Codex to read the PRD and generate all components required for your video concepts.
You can also add screenshots or videos of your product to the repository and ask Codex to organize them.
Step 5: Generate and Export Videos
Ask Codex to create the first video based on your concepts. Ensure the server is running with npm run dev.
Open http://localhost:3000 in your browser to view the video editor and your generated video.
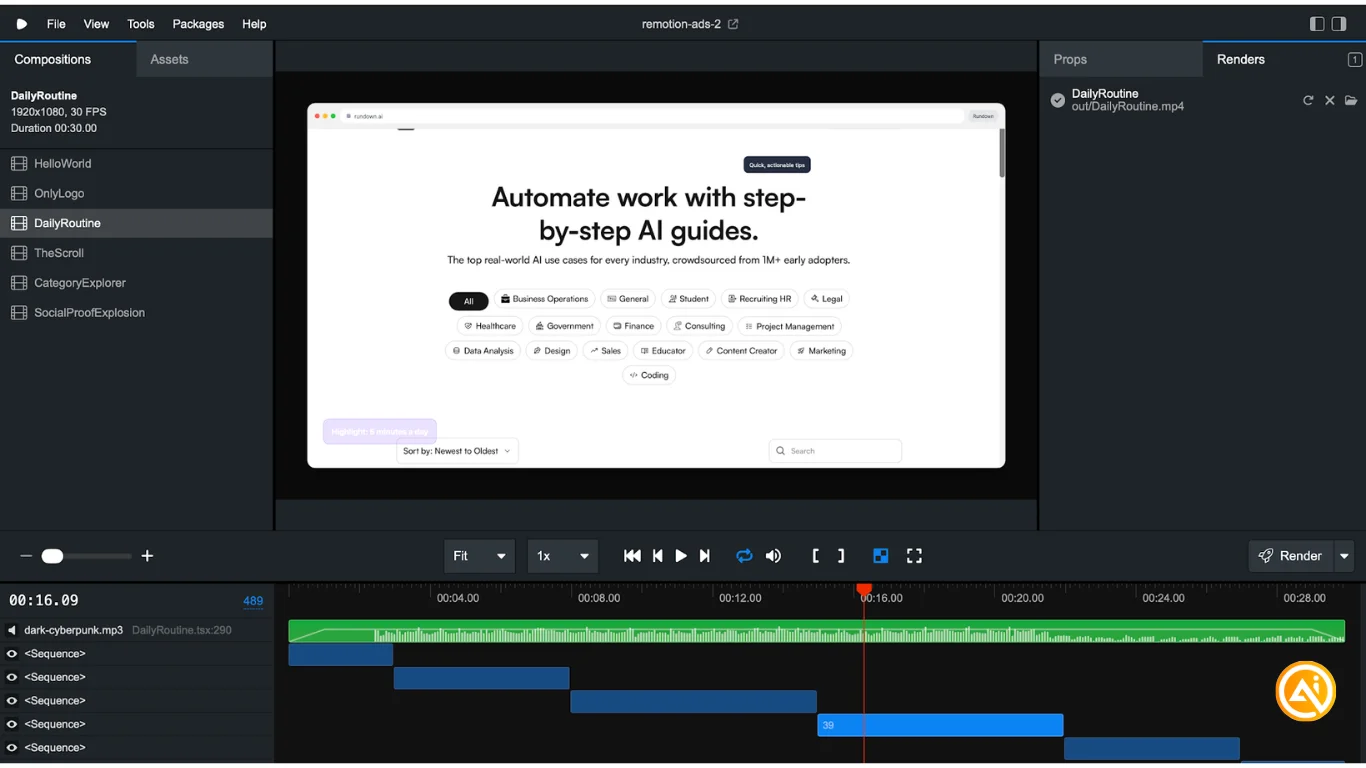
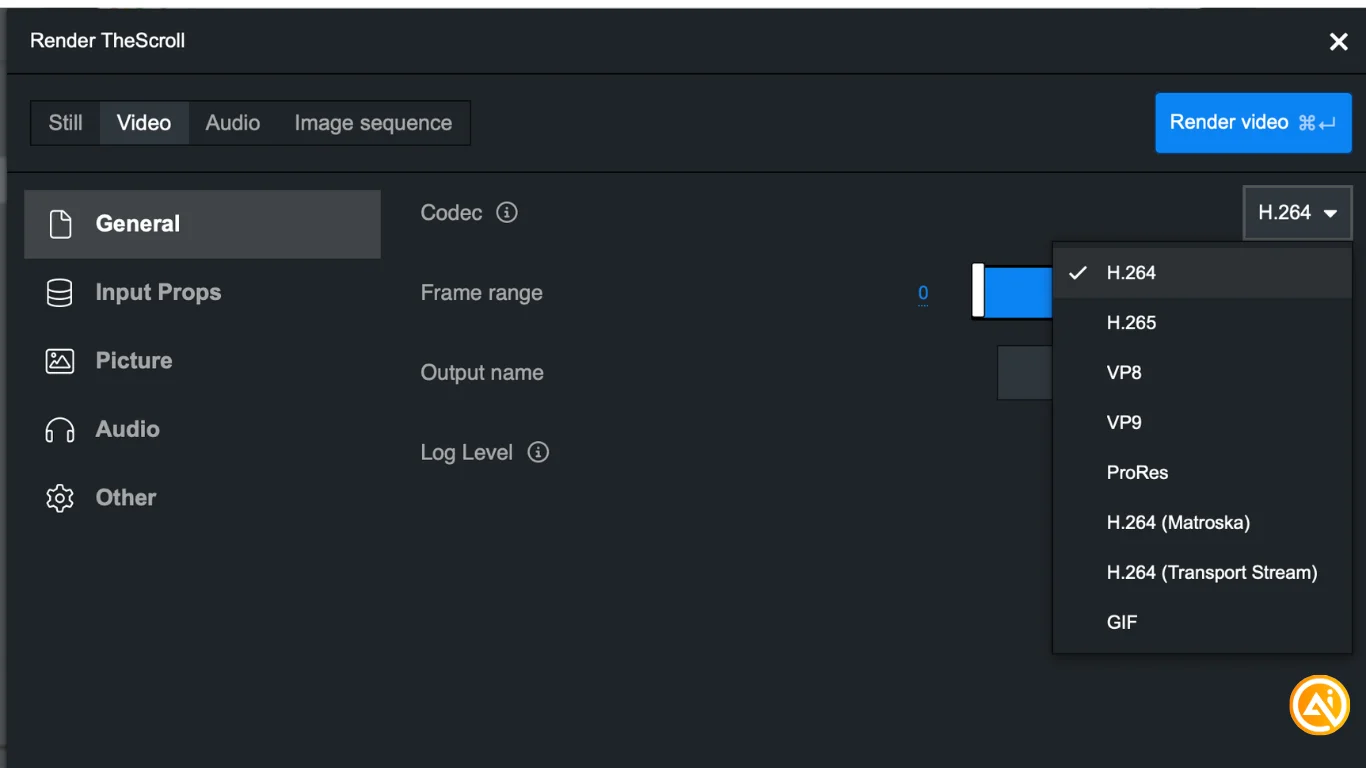
Click the rocket icon next to the video title to render and export. You can also batch render videos using:
npx remotion render [video name]
Use the format dropdown in the render menu to export the video as a GIF if needed.
Going Further
Search for royalty-free music or sound effects online. Add the MP3 files to your project and instruct Codex to include them in your videos using the Remotion skill.
For improved results, consider adding music and sound effect cues directly into your video scripts going forward.
Emily Newton
Emily Newton is an experienced Editor-in-Chief who has spent the last decade sharing her insights on science and technology advances through platforms like IoT for All and DZone. She is deeply interested in showcasing how connected technologies and smart ecosystems transform modern businesses. When she isn’t writing, Emily enjoys walking local trails, playing video games, or curling up with a good book.


