AI Tutorial
Create an AI Website Agent with Chatbase
Learn how to create a custom AI chatbot using Chatbase, train it on your website content, embed it on your site, and automate lead collection workflows.
Share
Chatbase allows businesses to build custom AI agents trained on website data. These chatbots can be embedded directly onto websites to automate customer support, answer visitor questions, and generate leads through conversational workflows.
Best Suited For:
- Business owners offering 24/7 customer support
- Marketing teams are improving lead generation
- Agencies building AI chatbot solutions for clients
- Teams automating customer communication workflows

STEP 1: Create and Train Your AI Agent
Start by opening the Chatbase dashboard and selecting:
“New AI Agent”
Chatbase supports several training methods, including:
- Website crawling
- File uploads
- Raw text input
- Notion integrations
The fastest setup method is training directly from the website content.
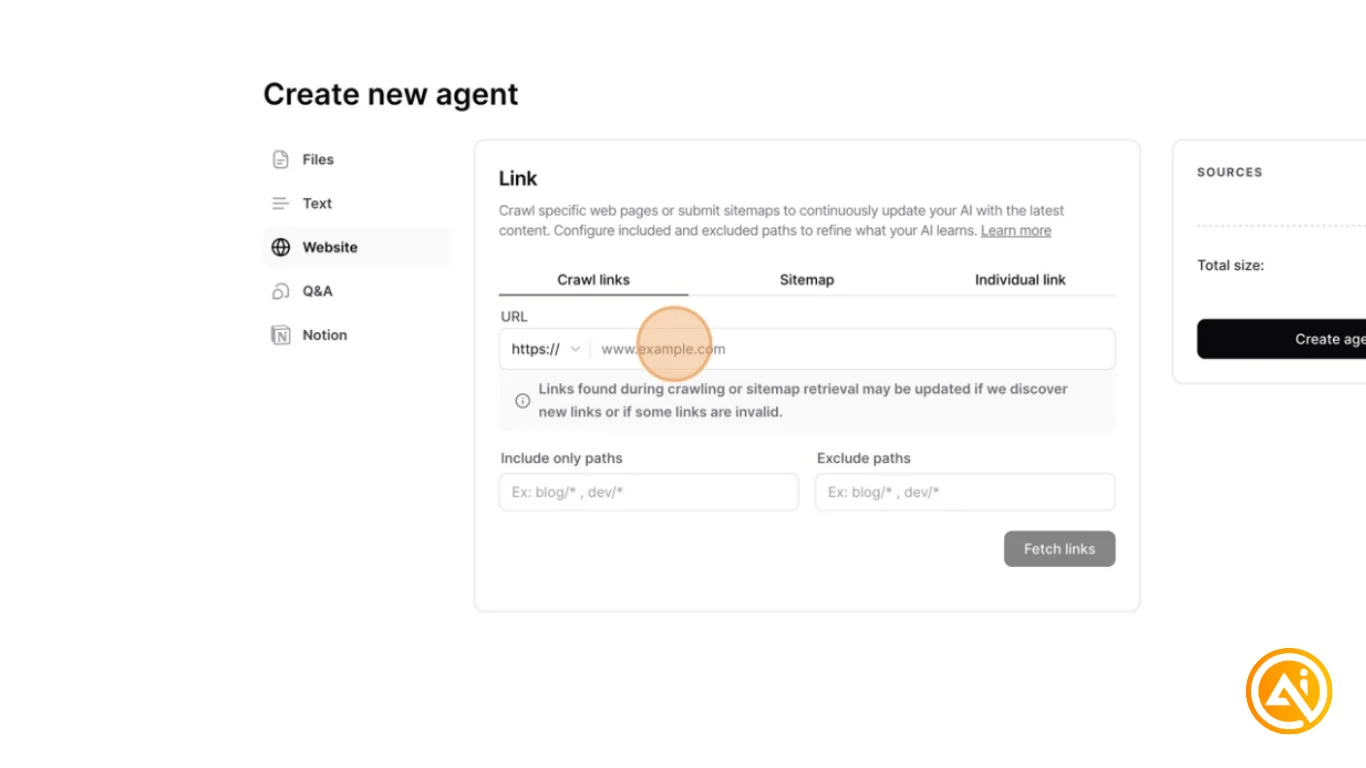
To Train Using Your Website:
- Select the Website option
- Paste the full website URL
- Click Fetch Links
Chatbase will crawl the website and extract information from the pages automatically.
This allows the chatbot to learn:
- Services and products
- Pricing details
- Frequently asked questions
- Company information
The result is an AI agent trained specifically on your business content.
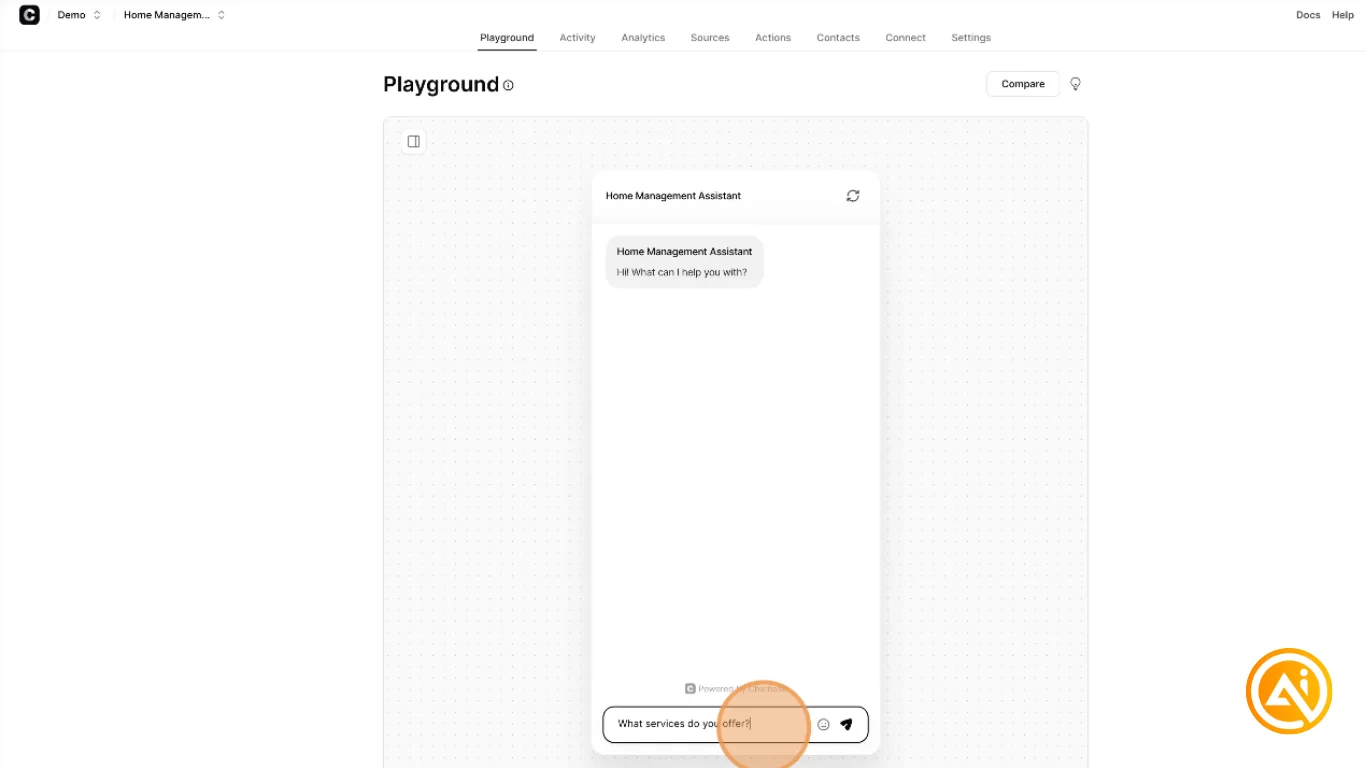
STEP 2: Test and Improve the Agent in Playground
After training is complete, Chatbase opens the Playground environment.
This testing area allows you to interact with the chatbot before deploying it publicly.
Example Questions:
- “What services do you offer?”
- “How does pricing work?”
- “How can I contact support?”
The chatbot’s behavior and tone can also be adjusted through the system prompt settings.
Additionally, the Activity tab allows conversation reviews so responses can be refined over time for greater accuracy.
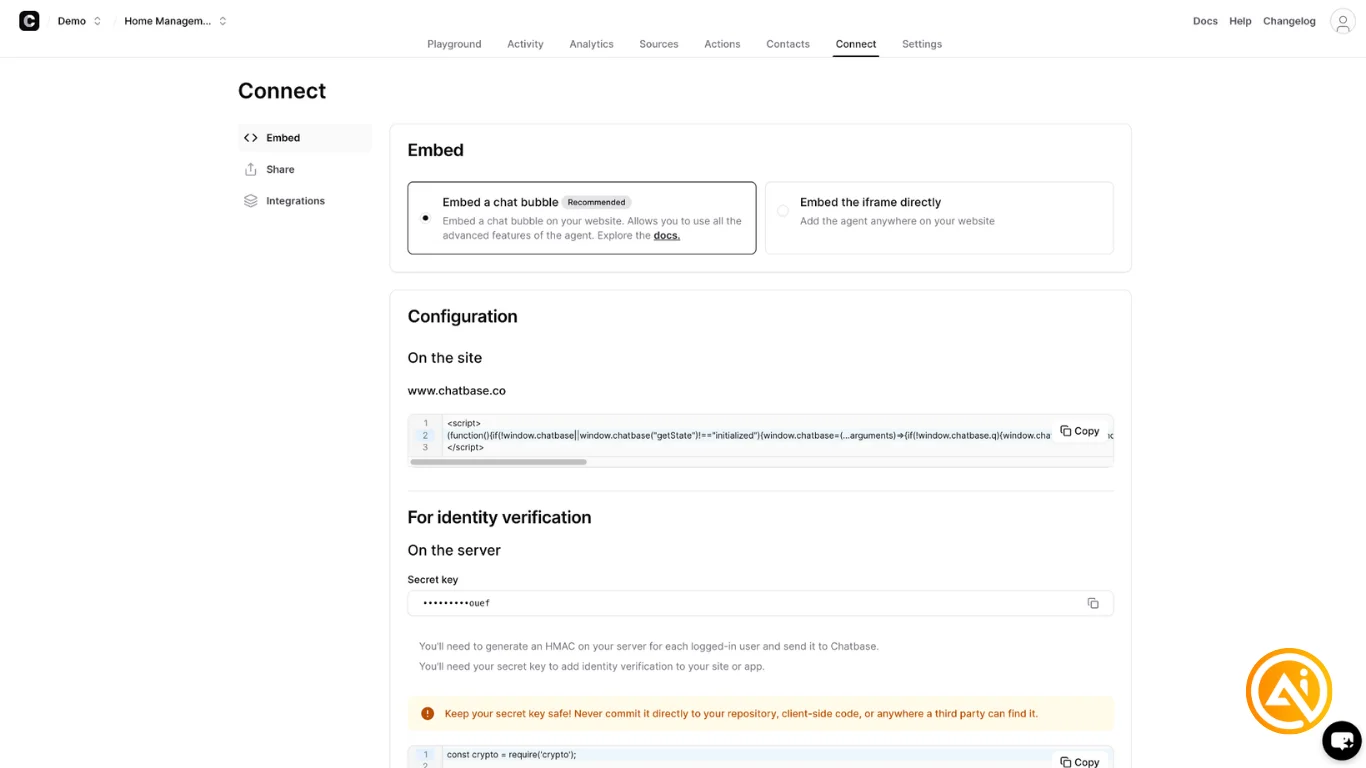
STEP 3: Embed the Chatbot on Your Website
Once satisfied with the chatbot responses, open the Connect tab to access deployment options.
Available Embedding Methods:
- Chat Bubble Embed — floating support widget
- Iframe Embed — embedded chatbot inside a webpage section
Copy the generated embed code and add it directly into your website HTML or provide it to a developer for implementation.
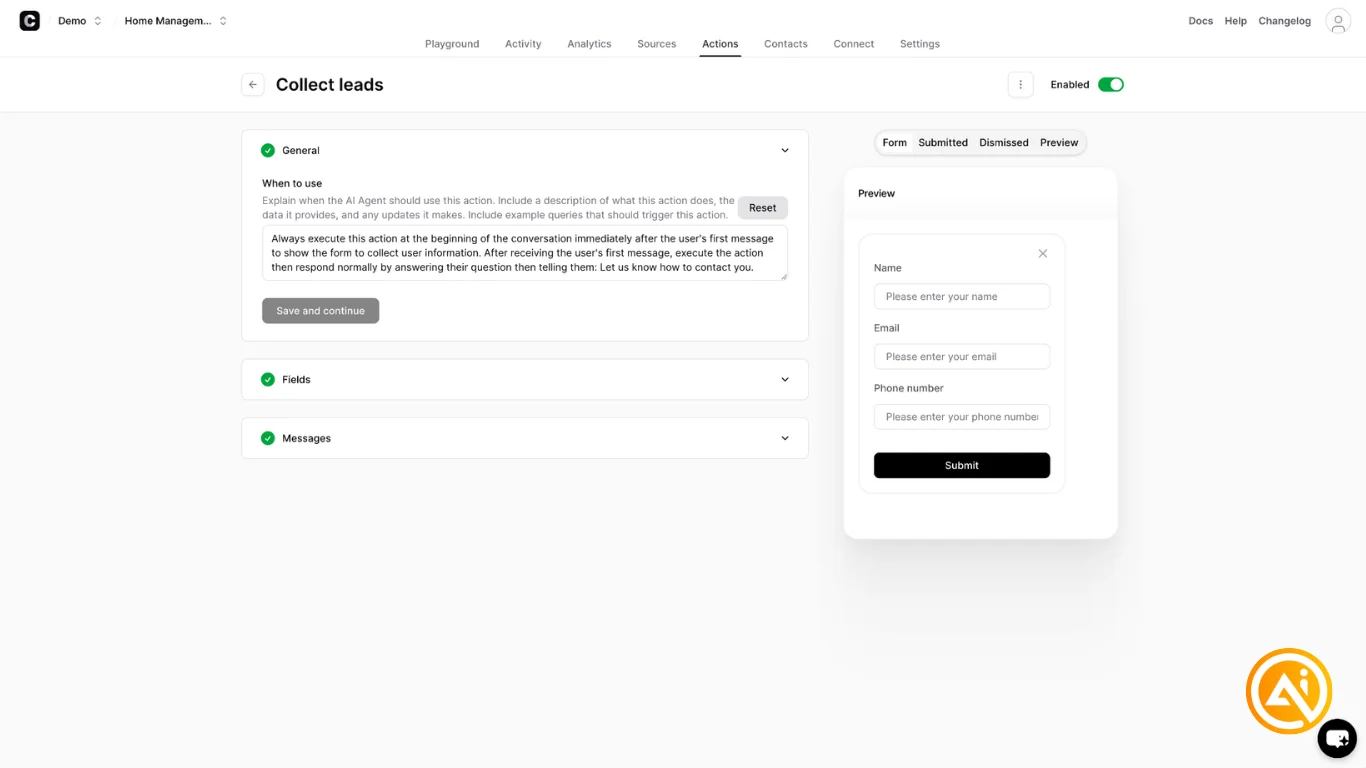
STEP 4: Enable Lead Collection
To turn the chatbot into a lead-generation system, open the Actions tab and select:
“Create Action”
Choose:
“Collect Leads”
This enables conversational lead forms that can request:
- Name
- Email address
- Phone number
Custom success messages can also be configured after submission.
Once configured, enable the lead collection feature to begin capturing visitor information automatically during conversations.
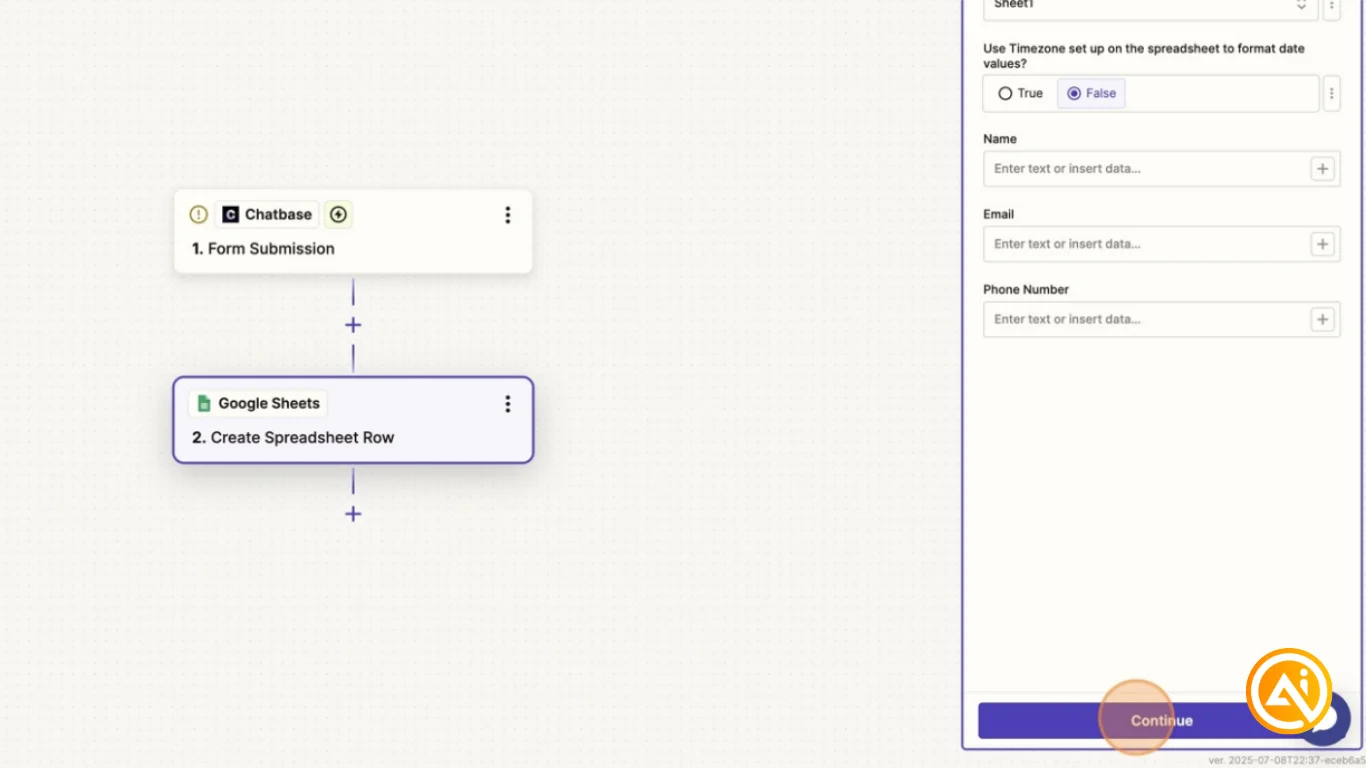
STEP 5: Automate Leads with Zapier
To fully automate lead management, connect Chatbase with automation platforms like Zapier.
Example Workflow:
- Trigger: Chatbase → Form Submission
- Action: Google Sheets → Create Spreadsheet Row
Inside Zapier:
- Add the Chatbase chatbot ID from the settings page
- Map form fields like name, email, and phone number
- Send collected leads directly into spreadsheets, CRMs, or other connected tools
This creates a fully automated customer support and lead capture workflow.
Pro Tip
Start by training the chatbot on only your highest-value pages, such as FAQs, services, pricing, and onboarding resources. Once response quality is strong, gradually expand the knowledge base to include additional documentation and support content.
Editorial Staff
The Editorial Staff at AIChief is a team of Professional Content writers with extensive experience in the field of AI and Marketing. AIChief was Founded in 2025, AIChief has quickly grown to become the largest free AI resource hub in the industry. Stay connected with them on Facebook, Instagram and X for the latest updates.


