AI Tutorial
Create a Full Set of Product Images with Nano Banana Pro
Learn how to use Nano Banana Pro to generate a cohesive 9-image Instagram feed for your brand. Perfect for marketers, creators, and e-commerce businesses.
Share
This guide explains how to use Nano Banana Pro to generate a complete 9-image Instagram grid for your brand using just a single visual reference.
Overview
Learn how to quickly produce a cohesive set of product images for social media. By using one inspiration image, you can generate a full Instagram feed that maintains a consistent visual identity across all posts.
Who is this for?
Content creators who need consistent, high-quality visuals on a regular basis
Marketers producing branded assets without a dedicated design team
E-commerce businesses running visually aligned campaigns
Brands aiming to build a recognizable aesthetic across platforms
Step 1: Set up Nano Banana Pro
Start by opening Google Gemini and navigating to the image generation tools.
- Click on Tools
- Select Create Images
- Enable Pro mode
Next, gather one or more reference images of your product. These could include past ads, product shots, or any visuals that match the style you want.
Step 2: Define your product and style
Upload your reference images into Nano Banana Pro.
Write a detailed prompt describing:
- The product
- Color palette
- Lighting setup
- Background or environment
- Camera angles
- Additional elements (e.g., people, animals, props)
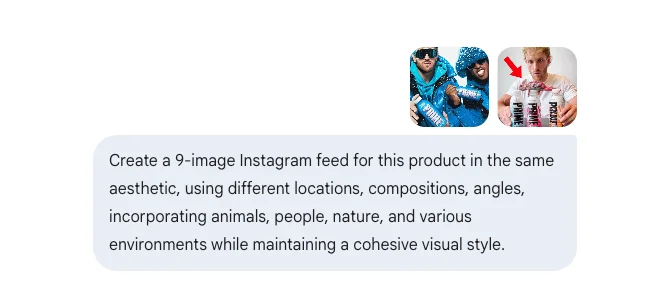
Example prompt:
Create a 9-image Instagram grid for this product using a consistent visual style. Vary the locations, compositions, and camera angles. Include elements like people, animals, and natural environments while keeping the overall aesthetic cohesive.
Step 3: Review and refine your results
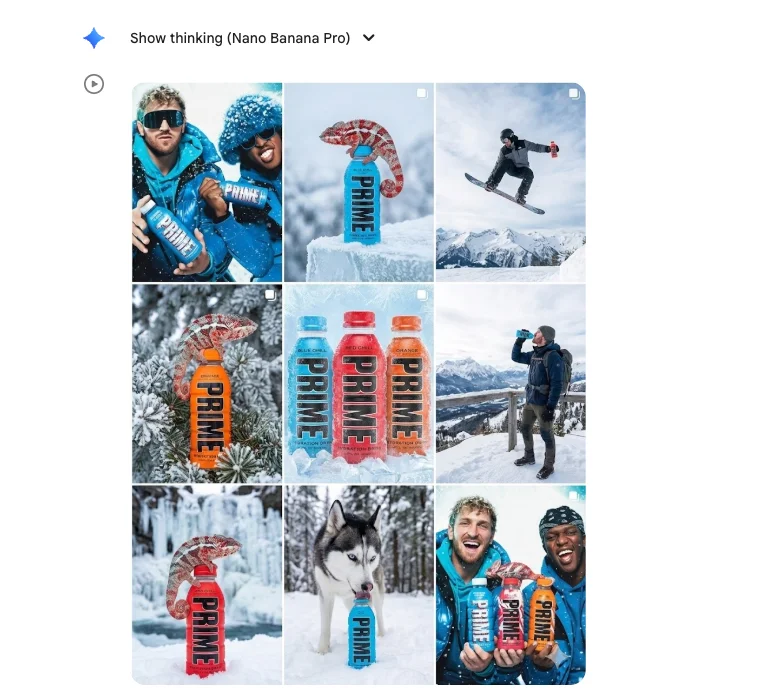
Submit your prompt to generate a full 9-image layout.
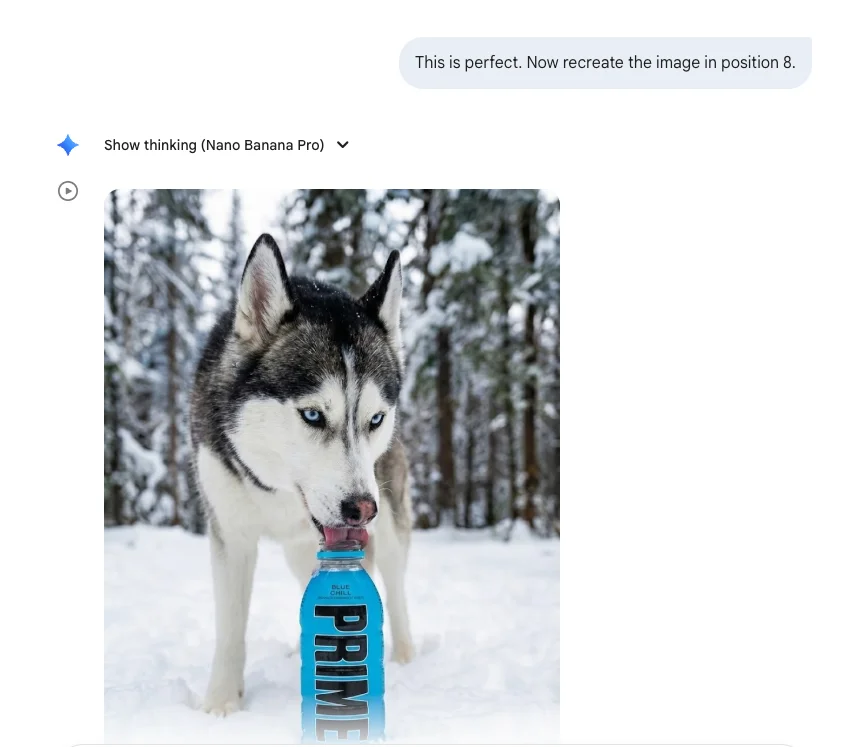
The tool will create a visually consistent grid based on your references. From here, you can refine individual images by requesting edits such as:
- Recreating a specific image from the grid
- Adjusting composition or elements
- Generating a single image as a standalone post
This step allows you to fine-tune each asset before publishing.
Step 4: Download and publish
Once you’re happy with the results:
- Open each image individually
- Download the files
- Upload them to your social media platforms
Repeat the process for any additional variations you want to create.
Pro Tip
This workflow is ideal for quickly filling out an entire Instagram feed with consistent branding. It’s especially useful for product-based businesses promoting across platforms like Instagram and TikTok. The more detailed and aligned your reference images are, the better the generated results will match your desired style.
Editorial Staff
The Editorial Staff at AIChief is a team of Professional Content writers with extensive experience in the field of AI and Marketing. AIChief was Founded in 2025, AIChief has quickly grown to become the largest free AI resource hub in the industry. Stay connected with them on Facebook, Instagram and X for the latest updates.


