AI Tutorial
Achieve Pixel-Perfect Website Edits with AI
Learn how to fine-tune your website UI with precision using the Stagewise plugin in Cursor, edit elements visually without breaking your layout.
Share
This guide explains how to use the Stagewise plugin in Cursor to make precise visual changes to your website by directly selecting UI elements, without the need to manually tweak code or risk breaking layouts.
Best suited for:
- Developers refining AI-generated front-end code quickly
- Designers making precise UI adjustments without coding from scratch
- Founders and product managers improving prototypes efficiently
- Anyone building web apps with AI, aiming to polish final details
Step 1: Install Stagewise in Cursor
Start by adding the Stagewise extension to Cursor. Open your Cursor IDE, go to the Extensions panel in the sidebar, and search for “stagewise.” Click Install to add it.
This step enables Stagewise commands within your editor, preparing it for use in your projects.
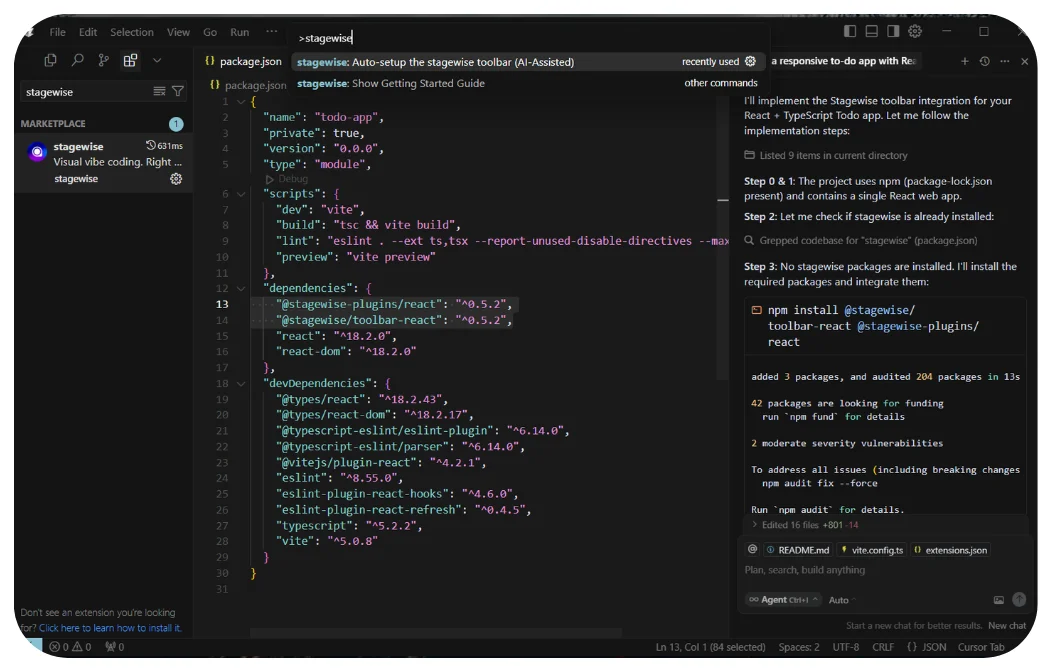
Step 2: Initialize Stagewise in your project
Stagewise must be set up individually for each project. Open your project folder in Cursor, then launch the command palette using Cmd + Shift + P (or Ctrl + Shift + P on Windows).
Search for “Stagewise” and select Stagewise: Auto setup toolbar. This will trigger a prompt in Cursor chat that scans your project files and updates them to include the interactive toolbar. Review the suggested changes and proceed.
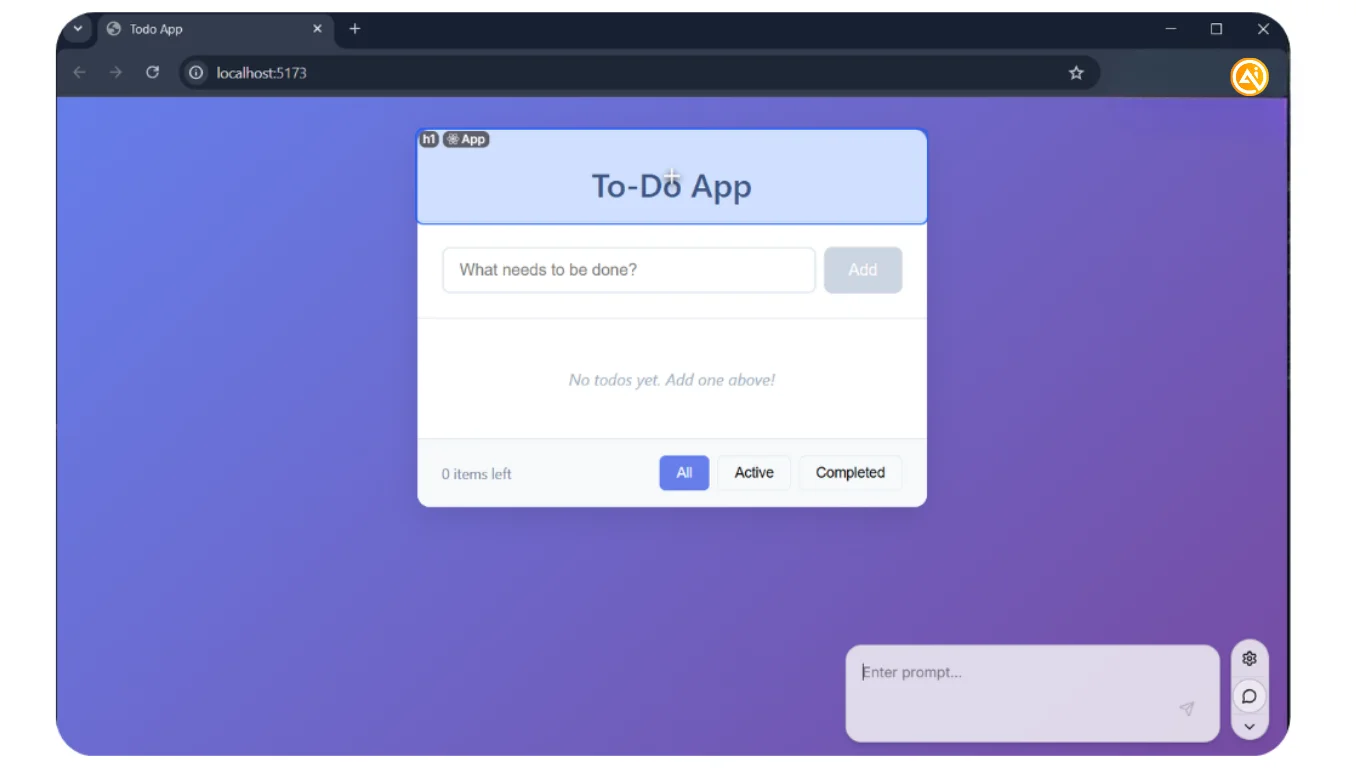
Step 3: Choose UI elements in your live app
After setup, run your application (for example, using npm run dev). Once your site loads in the browser, a Stagewise toolbar will appear at the bottom.
Activate selection mode from the toolbar. You can now hover over and click any element you want to modify. The selected item will be highlighted, confirming your choice; no need to describe it manually.
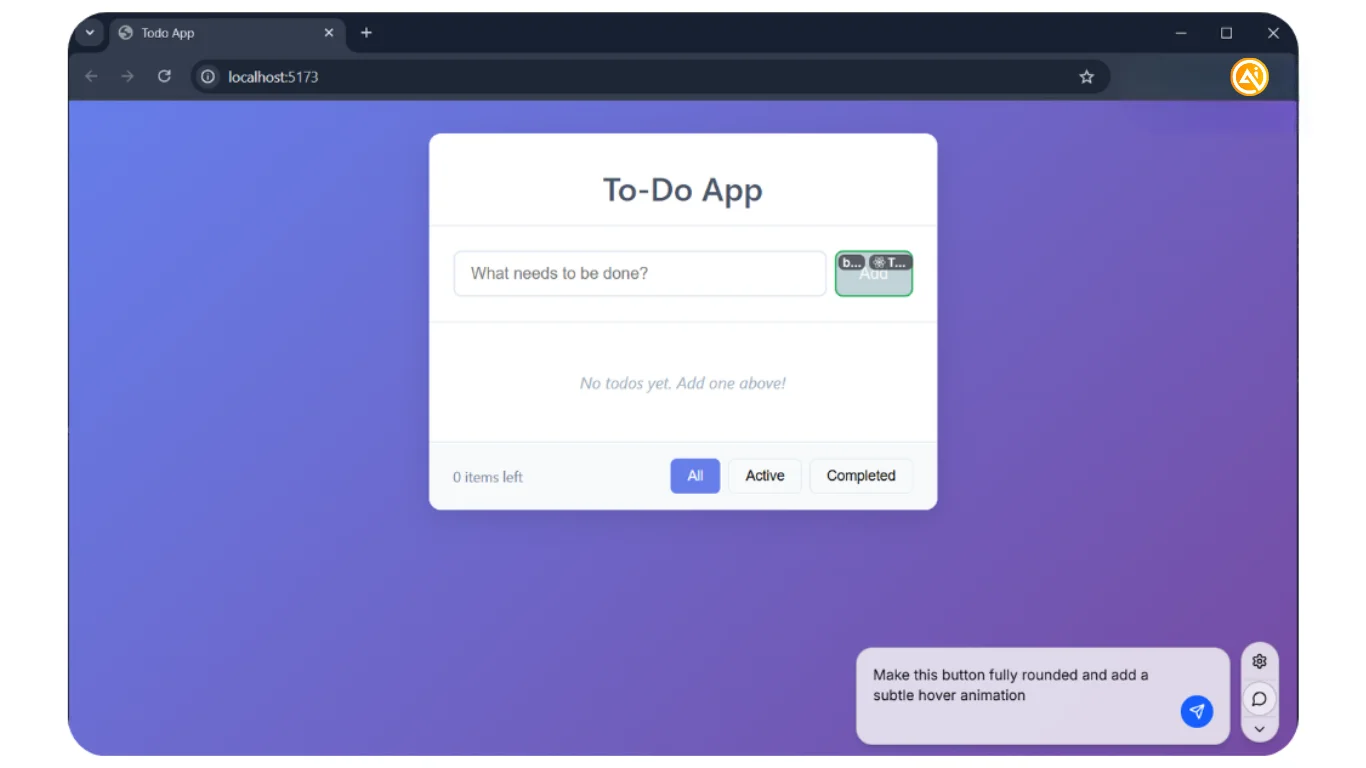
Step 4: Submit a targeted edit request
With an element selected, enter a clear instruction describing the change. For example:
“Make this button fully rounded and add a subtle hover animation.”
When submitted, Stagewise combines your instruction with detailed context (like element position and class names) and sends it to Cursor for precise updates.
Step 5: Review and iterate
You’ll instantly see updates reflected in your UI. To make further adjustments, simply select another element and repeat the process.
This workflow of selecting and prompting helps you refine your interface smoothly, turning rough AI-generated designs into polished, production-ready results.
Pro Tip
Select multiple elements at once to apply consistent styling changes across your interface, ideal for updating fonts, colors, or button styles in a single step.
Editorial Staff
The Editorial Staff at AIChief is a team of Professional Content writers with extensive experience in the field of AI and Marketing. AIChief was Founded in 2025, AIChief has quickly grown to become the largest free AI resource hub in the industry. Stay connected with them on Facebook, Instagram and X for the latest updates.


